To start creating a new automation, go to the Automations section in the left sidebar and click the Create Automation button.
The system will offer two starting options:
-
Use templates: Select from ready-made templates. This section contains the 6 most common scenarios. If none of them suit you, you can switch to manual creation by clicking the Build manually link at the bottom of this window.
-
Build manually: Creating an automation completely from scratch.
The process is then divided into several logical steps.
Step 1. Logic builder (Builder)
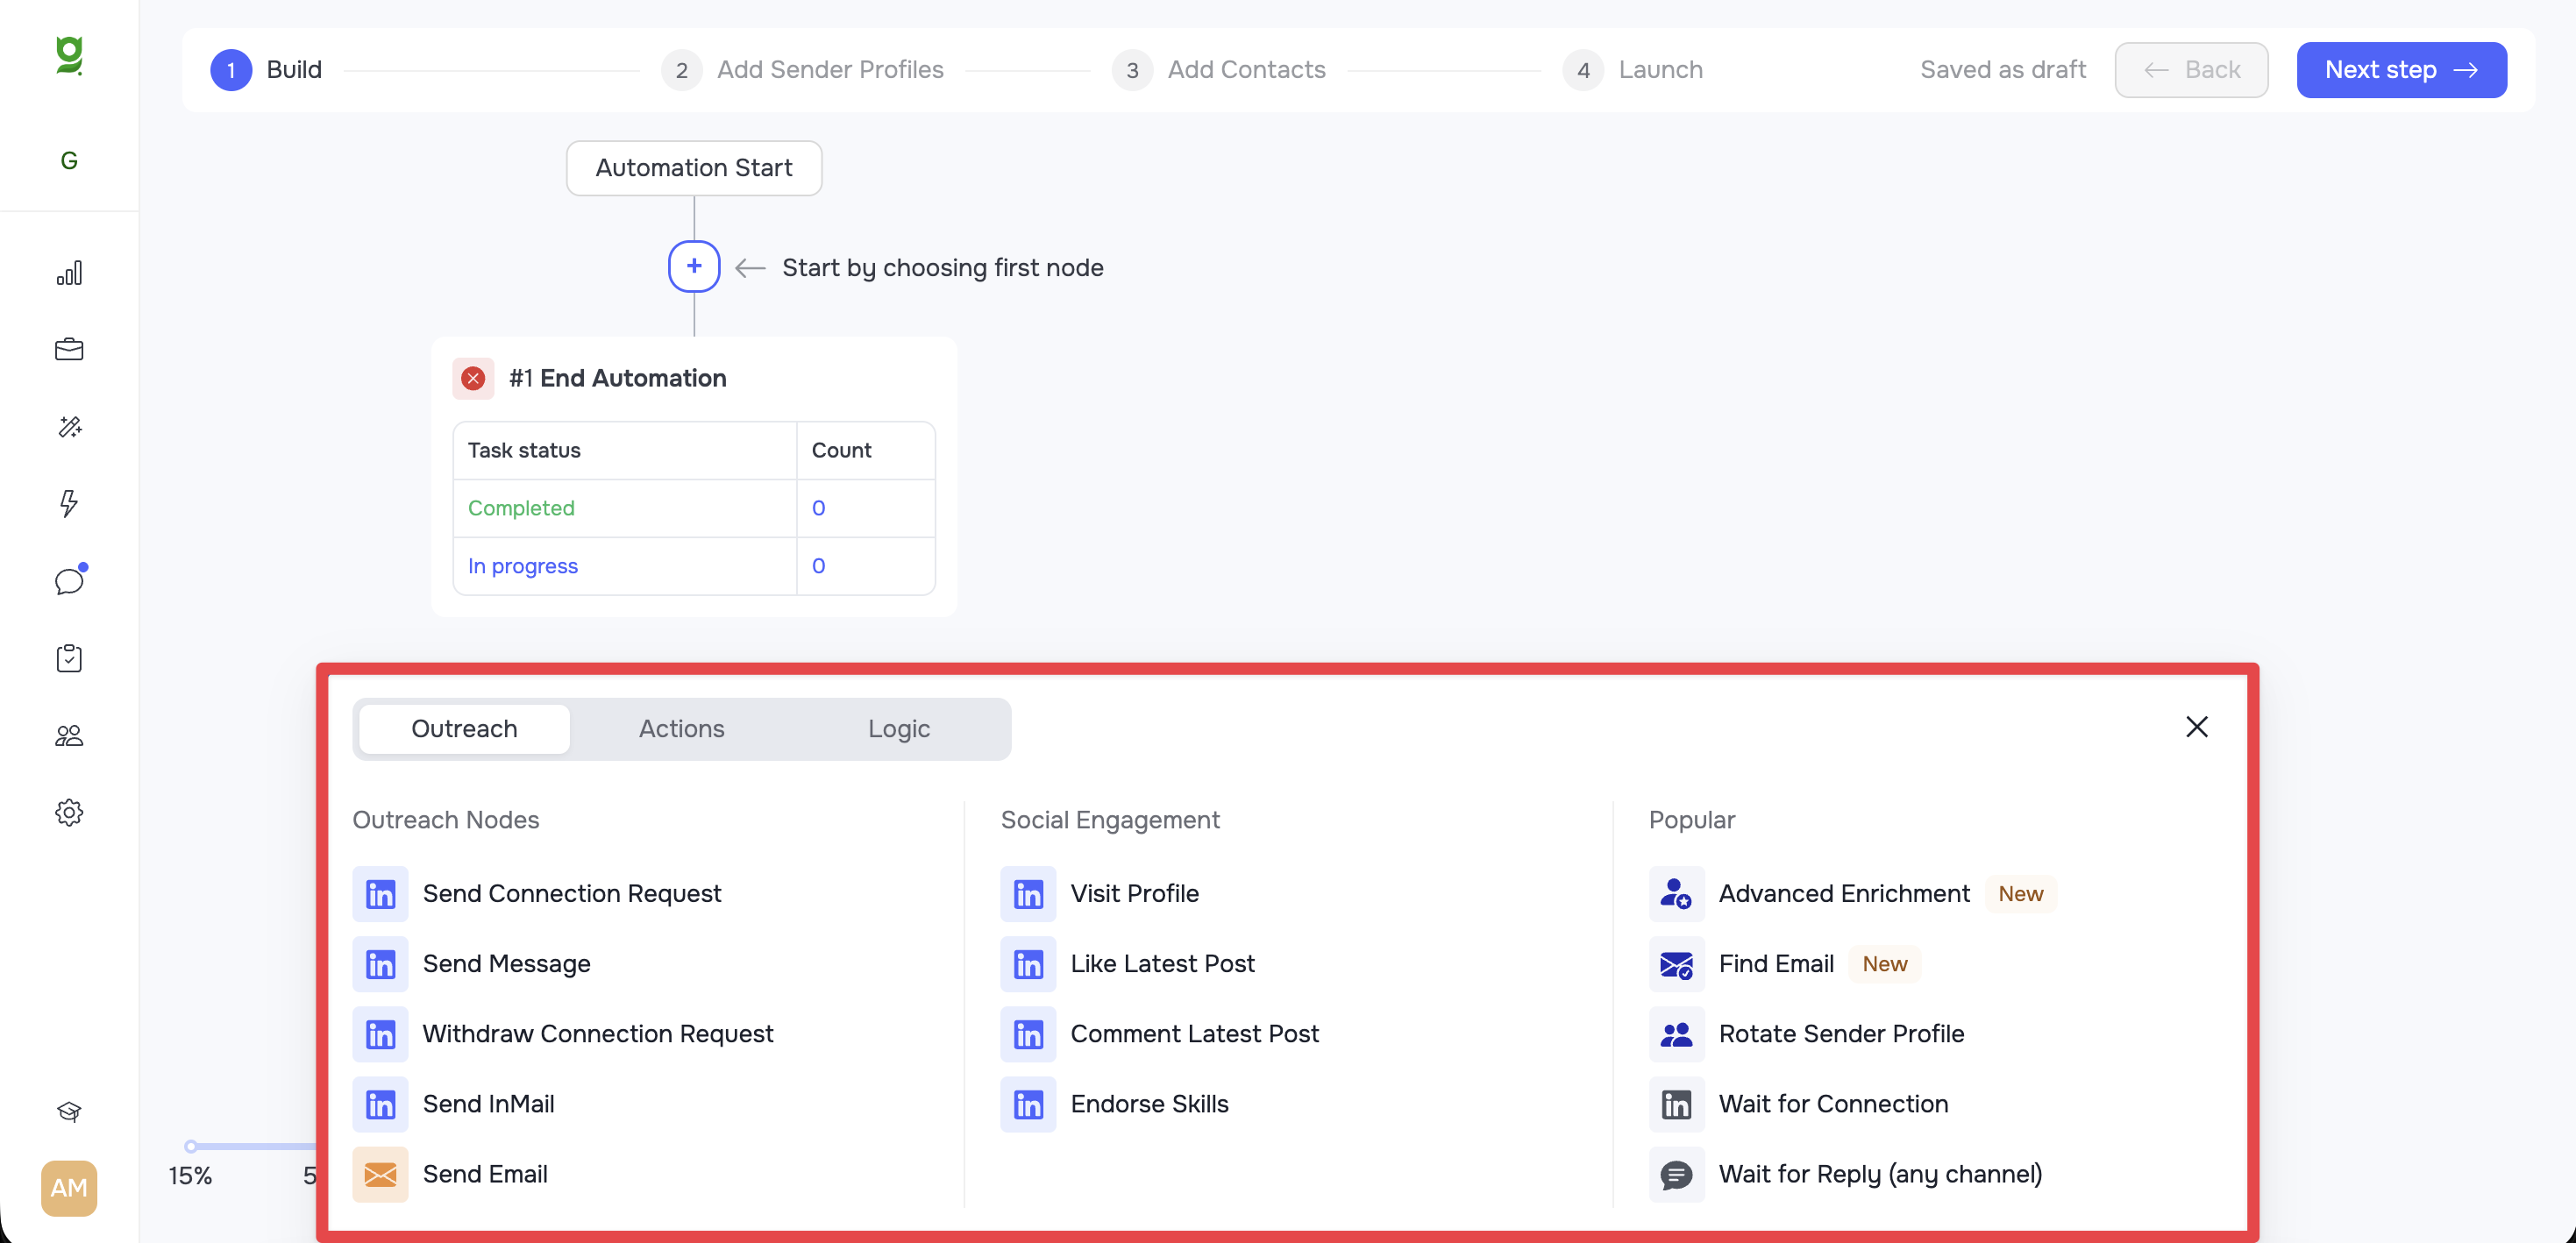
After choosing a creation option, you go straight to the visual builder.
-
Here you will see the list of available nodes (Nodes), which are split into categories: Outreach, Actions, and Logic.
-
Your goal at this step is to build the scenario and the sequence of actions the automation will follow.
🟢 Tip: A detailed description of all nodes, their functionality, and use cases is covered in a separate article [Nodes Overview and Building Automation Logic].
Step 2. Adding senders (Add Sender Profiles)
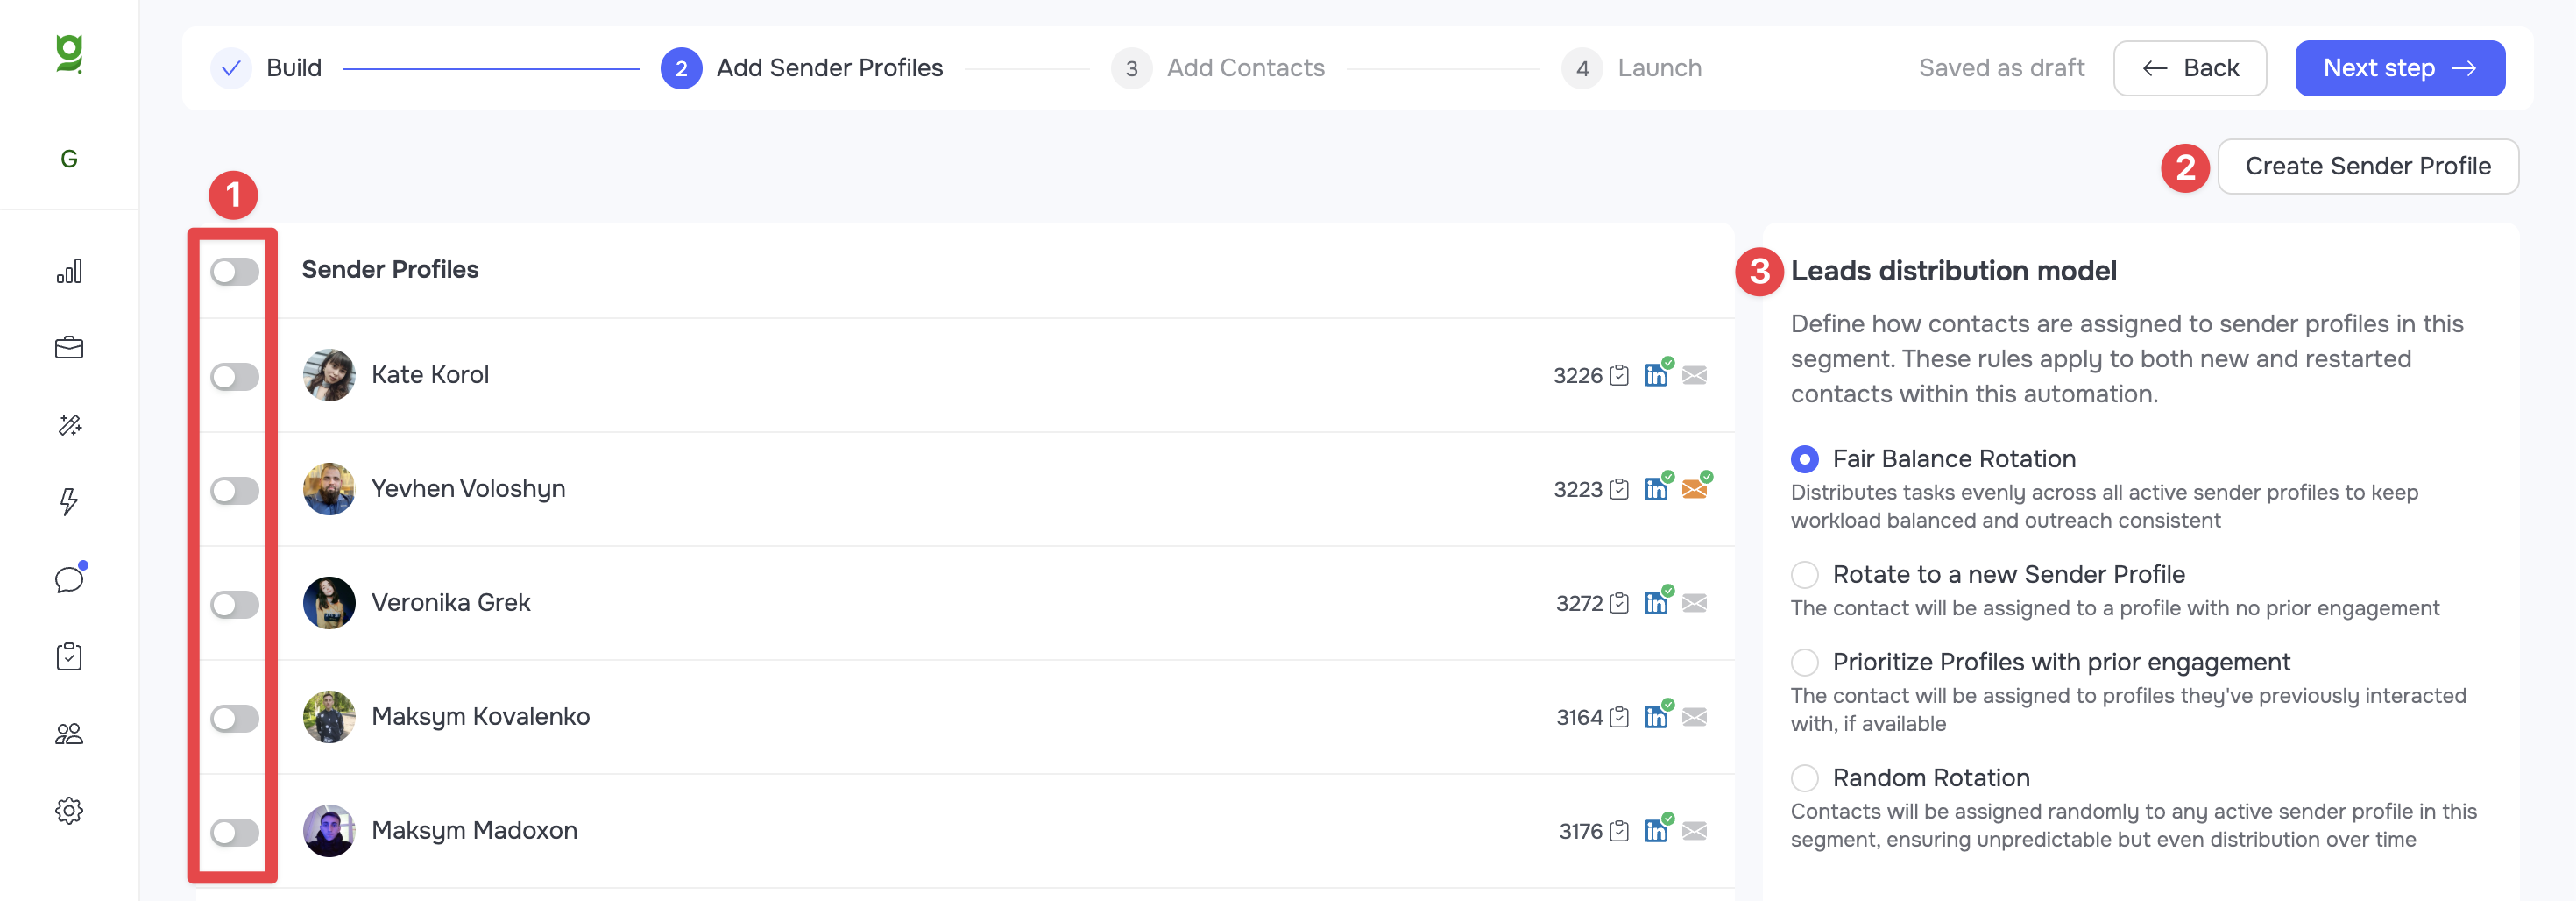
Once the logic framework is built, you need to define which sender profiles will be involved in this automation.
-
You can select one or several existing profiles at once from the suggested list (1).
-
If you are creating an automation for the first time and do not have any sender profiles yet, you can create and connect a new profile right at this step using the Create Sender Profile (2) button.
-
In this window, you configure the Leads distribution model (3) - the model for distributing contacts among the selected senders. The detailed distribution mechanics are described in the article [How to Set the Contact Distribution Method in an Automation].
Step 3. Adding contacts (Add Contacts)
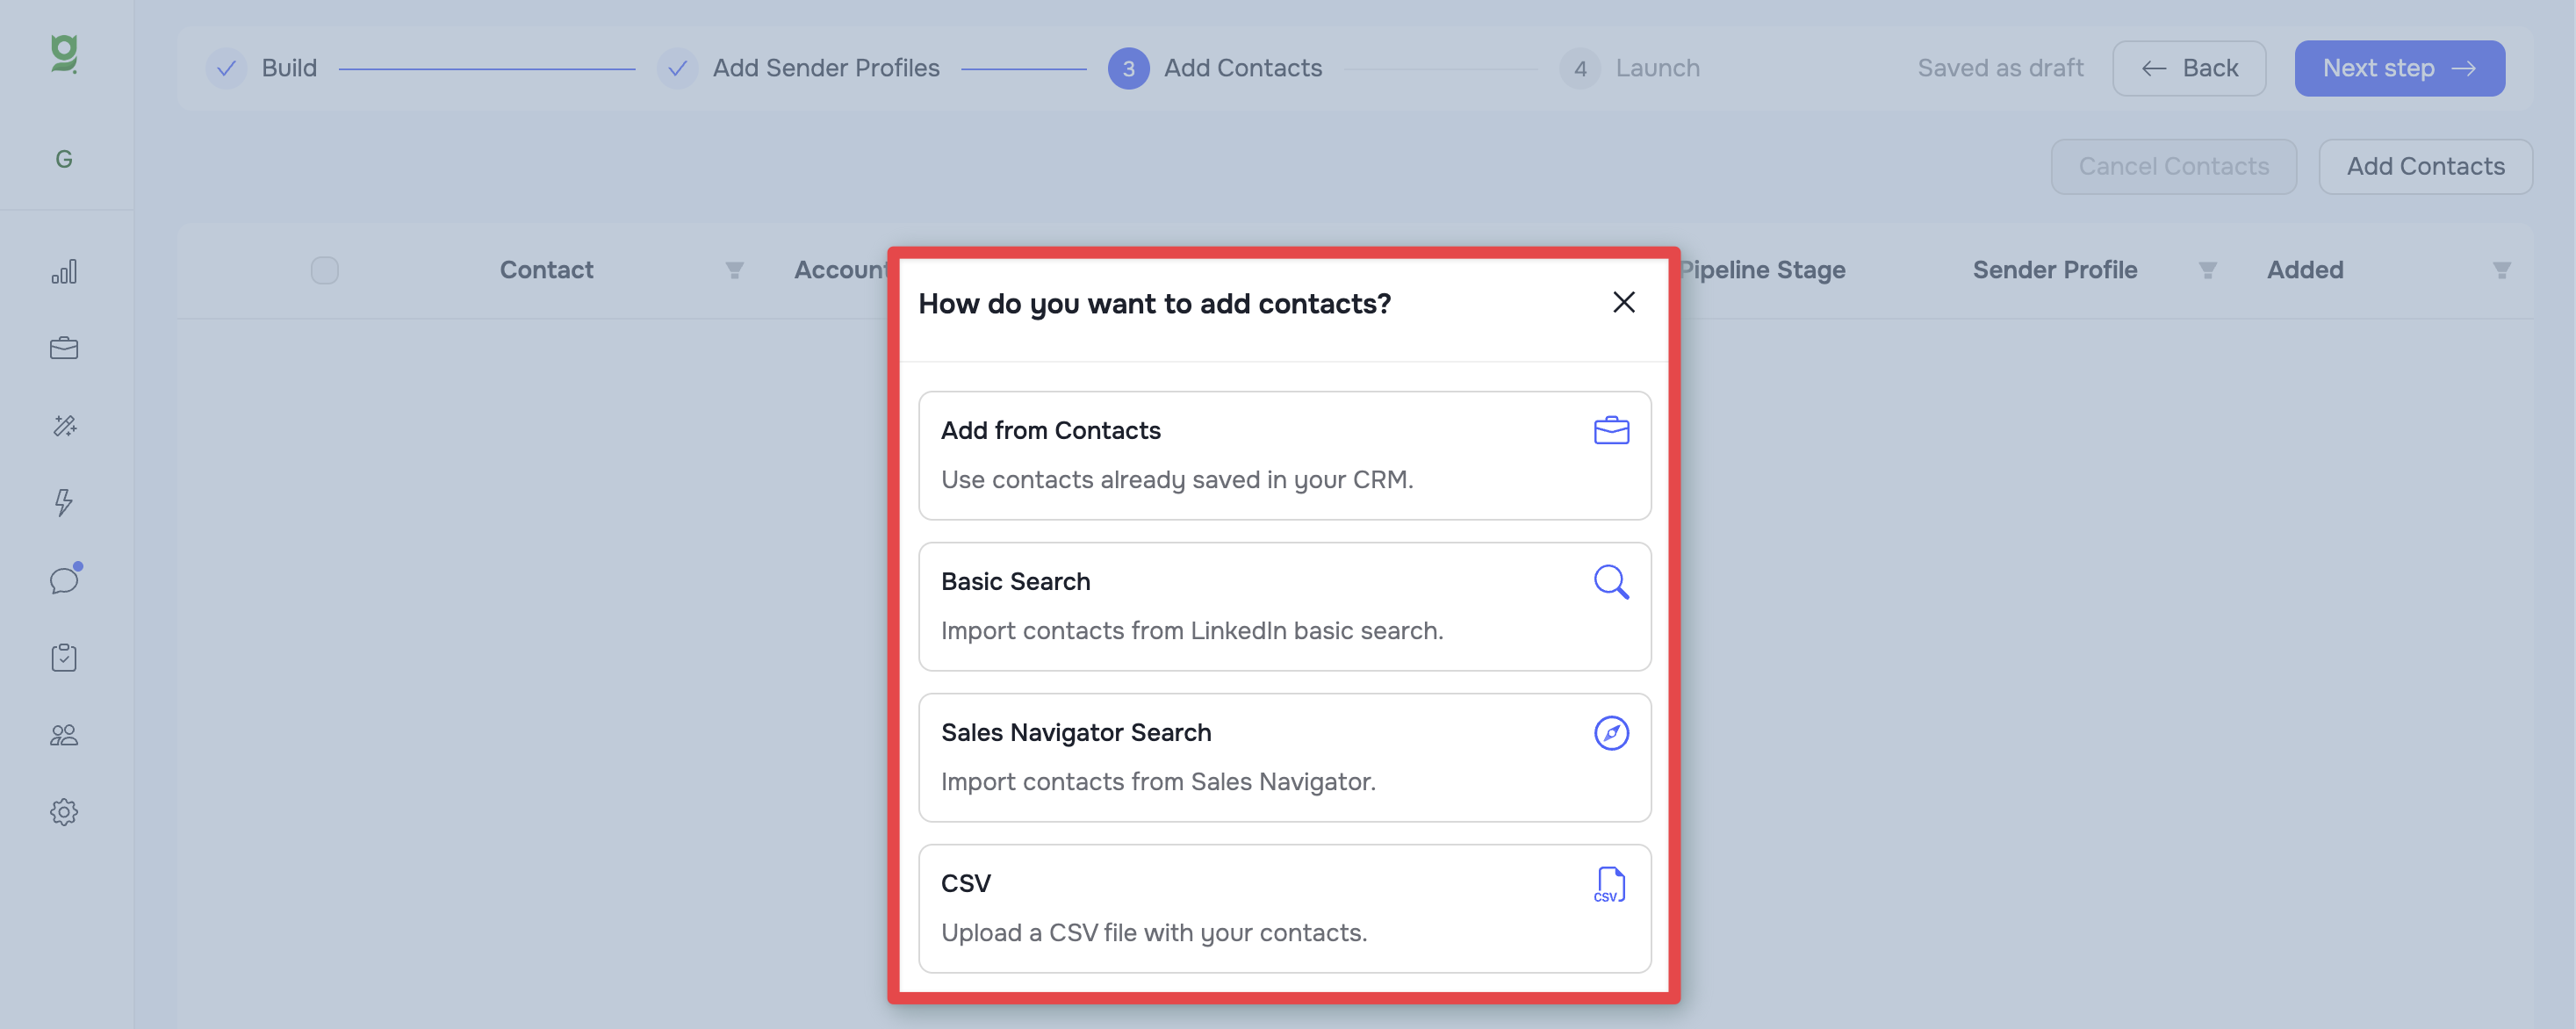
The next step is adding your target audience to the automation. Click the Add Contacts button, and the system will offer several import options:
-
Add from Contacts: Adding contacts that are already saved in your internal CRM.
-
Basic Search: Uploading contacts from LinkedIn basic search results.
-
Sales Navigator Search: Uploading contacts from Sales Navigator search results.
-
CSV: Uploading a contact database via a CSV file.
🟢 Tip: You will find detailed information about working with the internal CRM system and the import algorithms in these articles:
[Internal CRM overview]
[Working with Imports in CRM: A Complete Guide]
Step 4. Configuring the details and launching (Launch)
The final step is entering the final parameters before the automation actually starts.
-
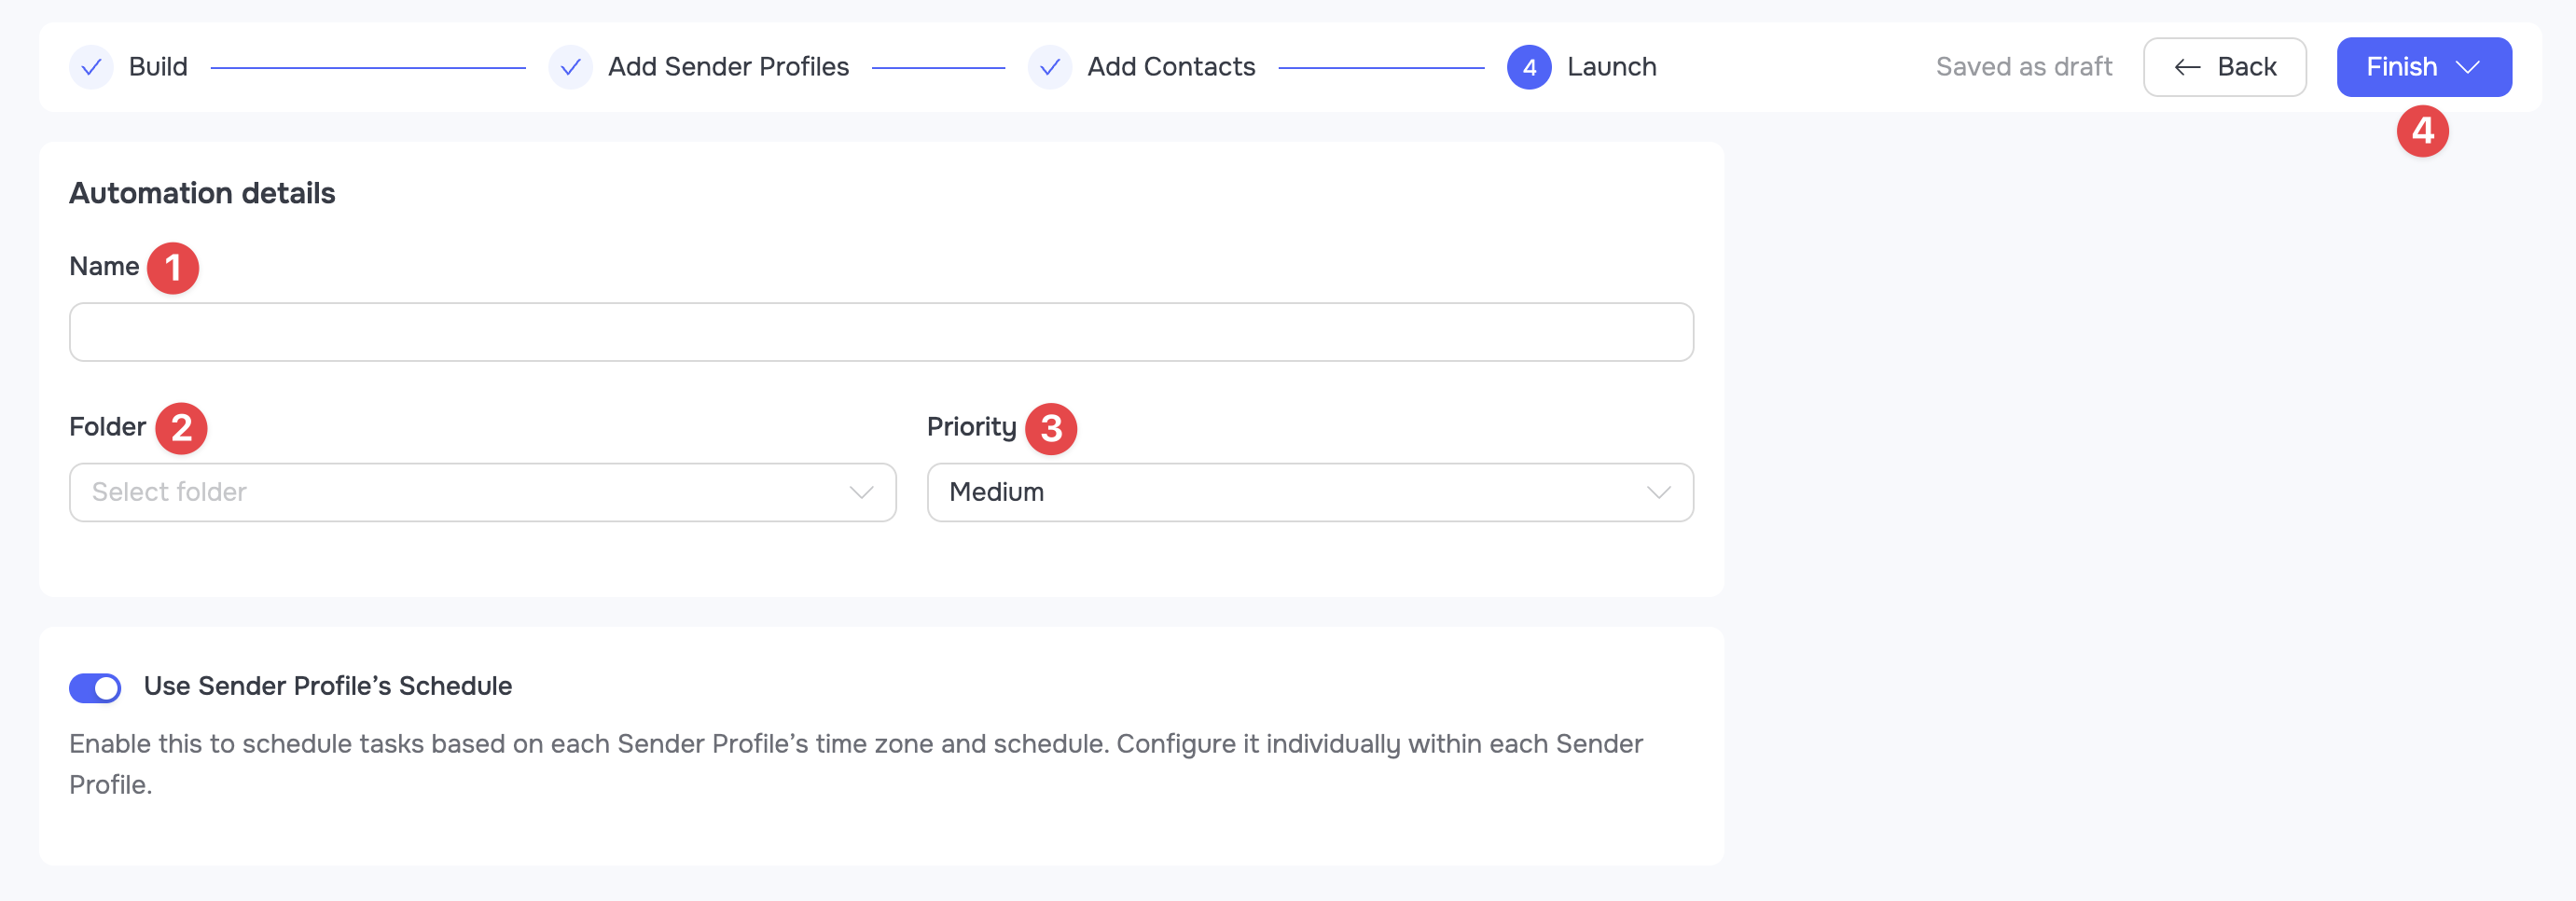
Enter a name in the Automation name (1) field.
-
Optionally, choose a folder in the Folder (2) dropdown menu where this automation will be stored.
-
Set the priority level in the Priority (3) menu (High, Medium, Low).
-
Configure the schedule: leave the Use Sender Profile's Schedule toggle on so that the automation runs in sync with the senders' schedules, or turn it off to set a unique schedule.
-
Click the Finish (4) button.
After that, the system will offer two options: launch the automation right now or save it for later.
Setup flexibility (Skipping steps)
Any of the steps described above can be skipped during the initial creation. Your automation will still be saved successfully in the general list. You can always open its Builder tab at any time later to add contacts, connect the required sender profiles, or finish building the missing logic.