Grinfi lets you manage the flow of contacts flexibly: you can add and remove contacts in bulk, individually, or using automatic rules.
Adding contacts to an automation
You can fill your automation with contacts in one of four ways:
At the automation creation stage
Adding a target audience is one of the basic steps when creating a new automation from scratch or from a template. The system will prompt you to add existing contacts from the CRM or create a separate import.
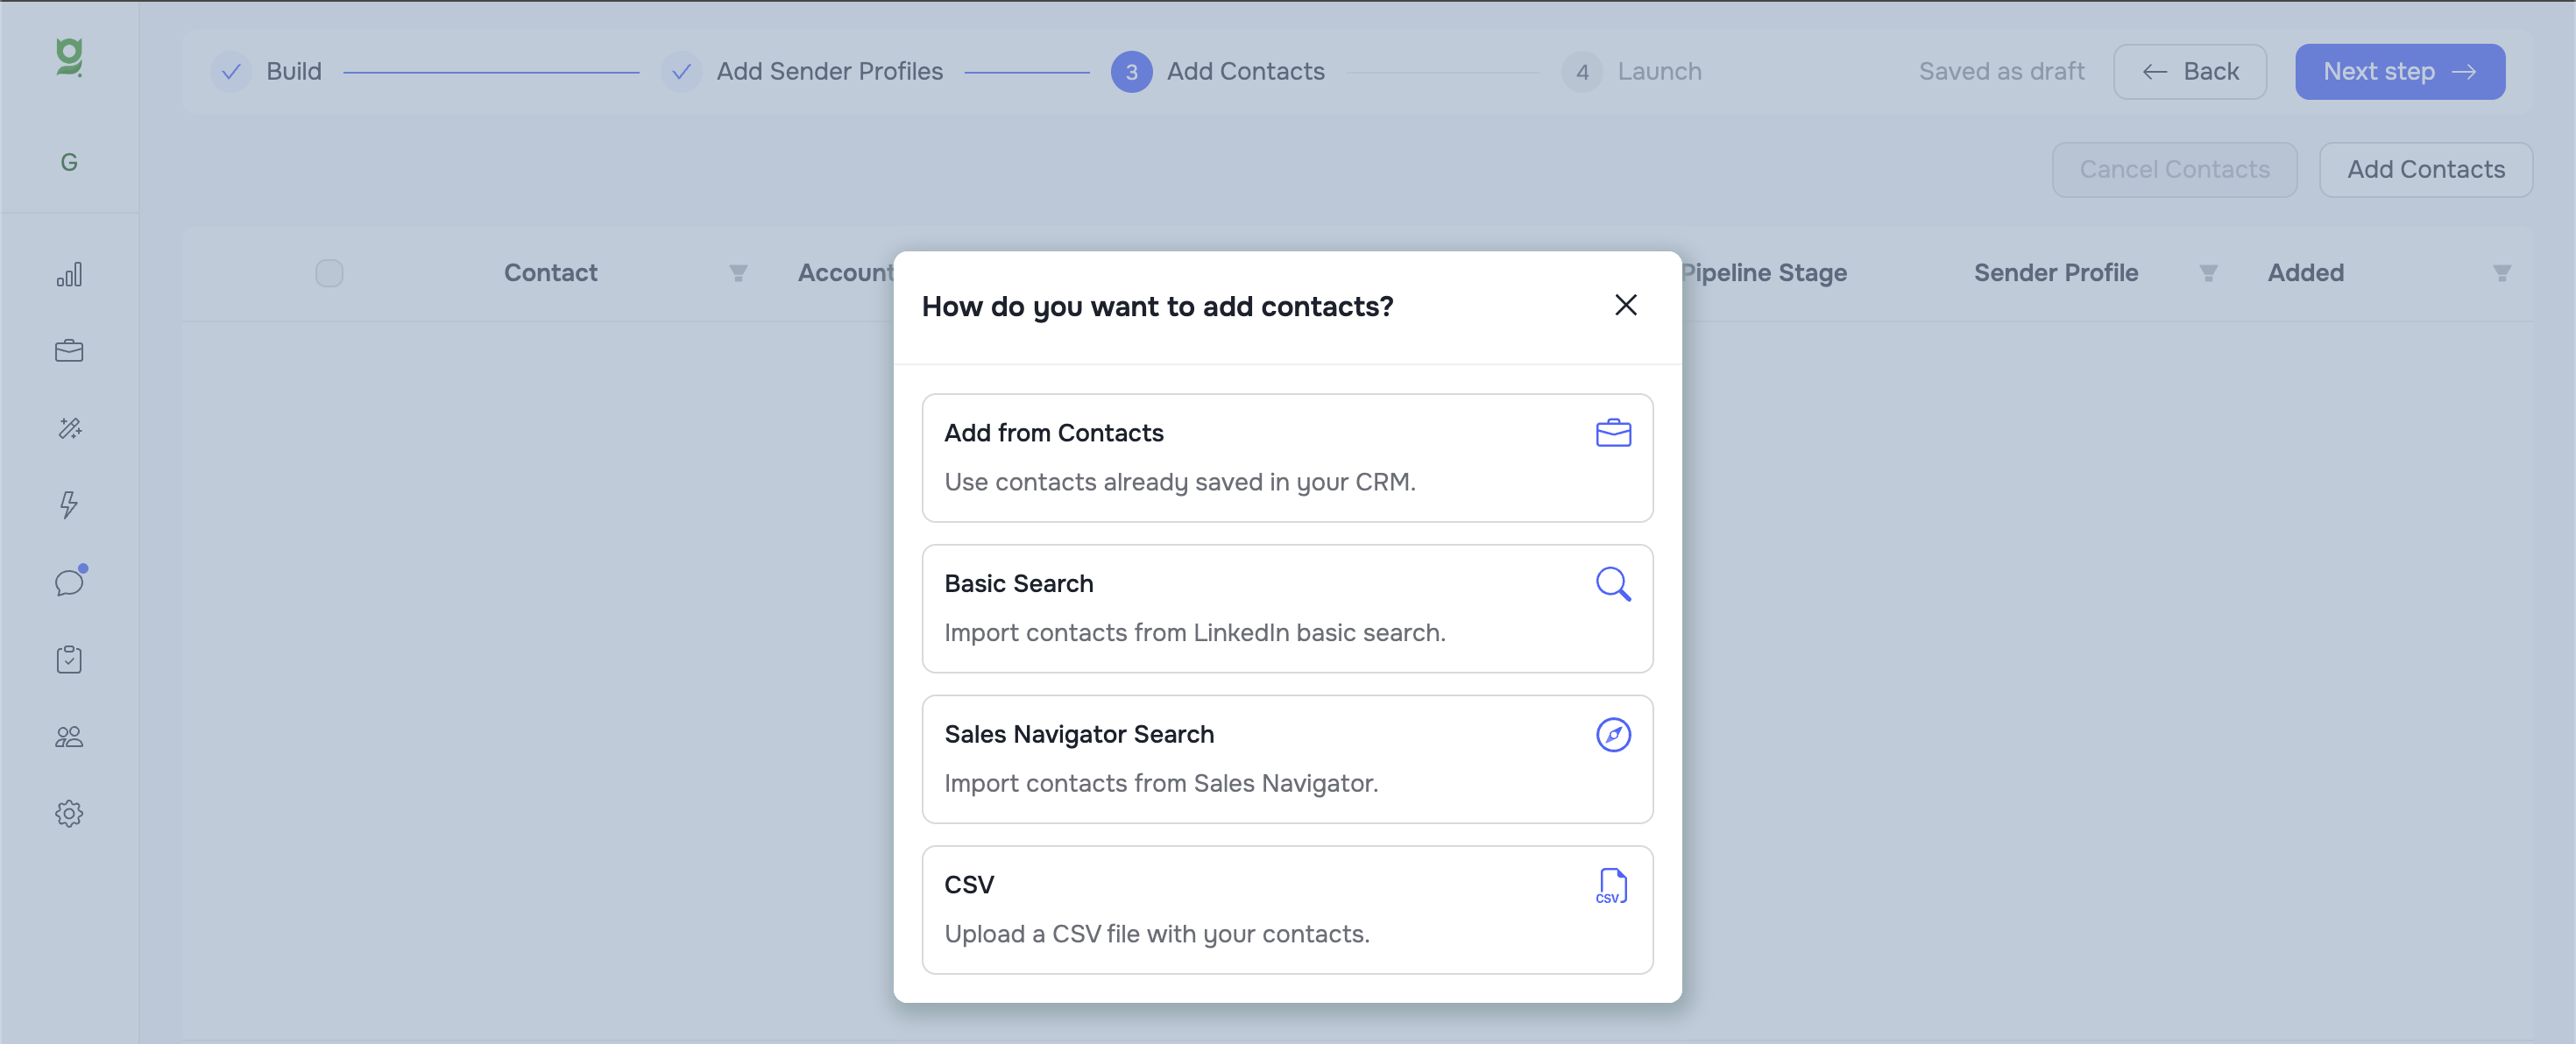
For details on this step, see the article: [Creating a New Automation: Step-by-Step Guide], Step 3. Add Contacts.
Adding contacts through the builder
You can add contacts to an already saved automation directly from its workspace.
-
Open the automation you need and go to the Builder tab.
-
Above the relevant segment, click the Add Contacts button.
-
In the modal window, use the filters to find the contacts you need, select them, and confirm the addition.
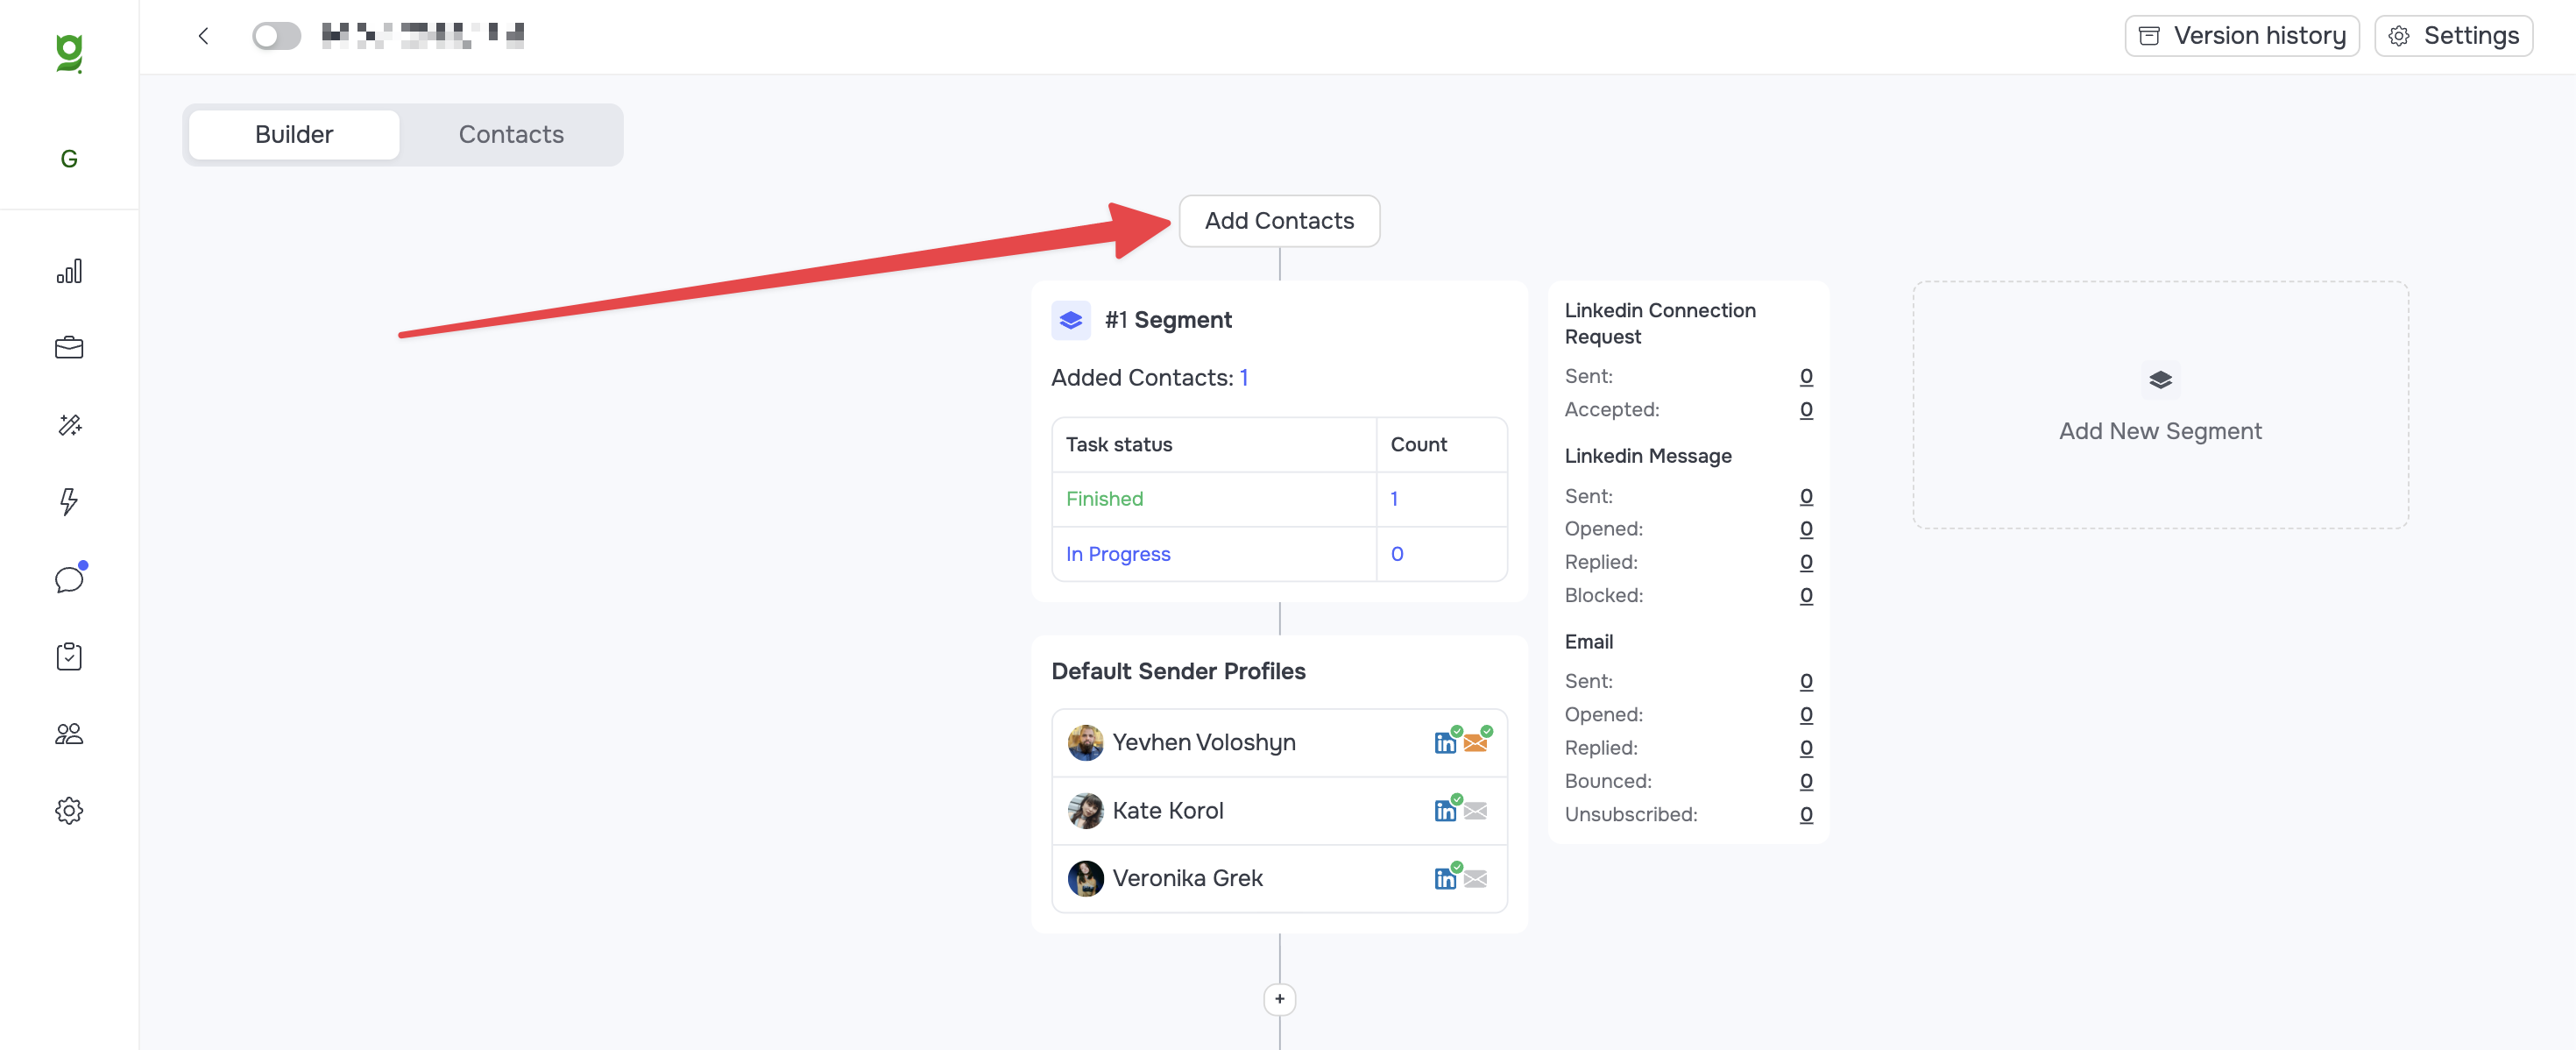
🟡 Note: This method works well if the automation contains several segments, since it lets you add contacts to each segment separately.
Applying an Auto Filter
You can set up a dynamic rule that adds contacts to a segment automatically.
-
In the Builder tab, click the block of the segment you need.
-
In the window that opens, click the Add filter button.
-
Set the selection criteria (for example, being in a specific list, a certain job title, or a tag).
-
As soon as a new contact that fully matches the specified criteria appears in your CRM, the system will instantly add them to the automation.
Bulk adding through the CRM
You can send contacts to an automation directly from the CRM, without going into the automation builder.
-
Go to the Contacts section in the CRM.
-
Filter and select the contacts you need.
-
In the top toolbar, expand the Automation menu and select Send to automation.
-
In the modal window, specify the target automation.
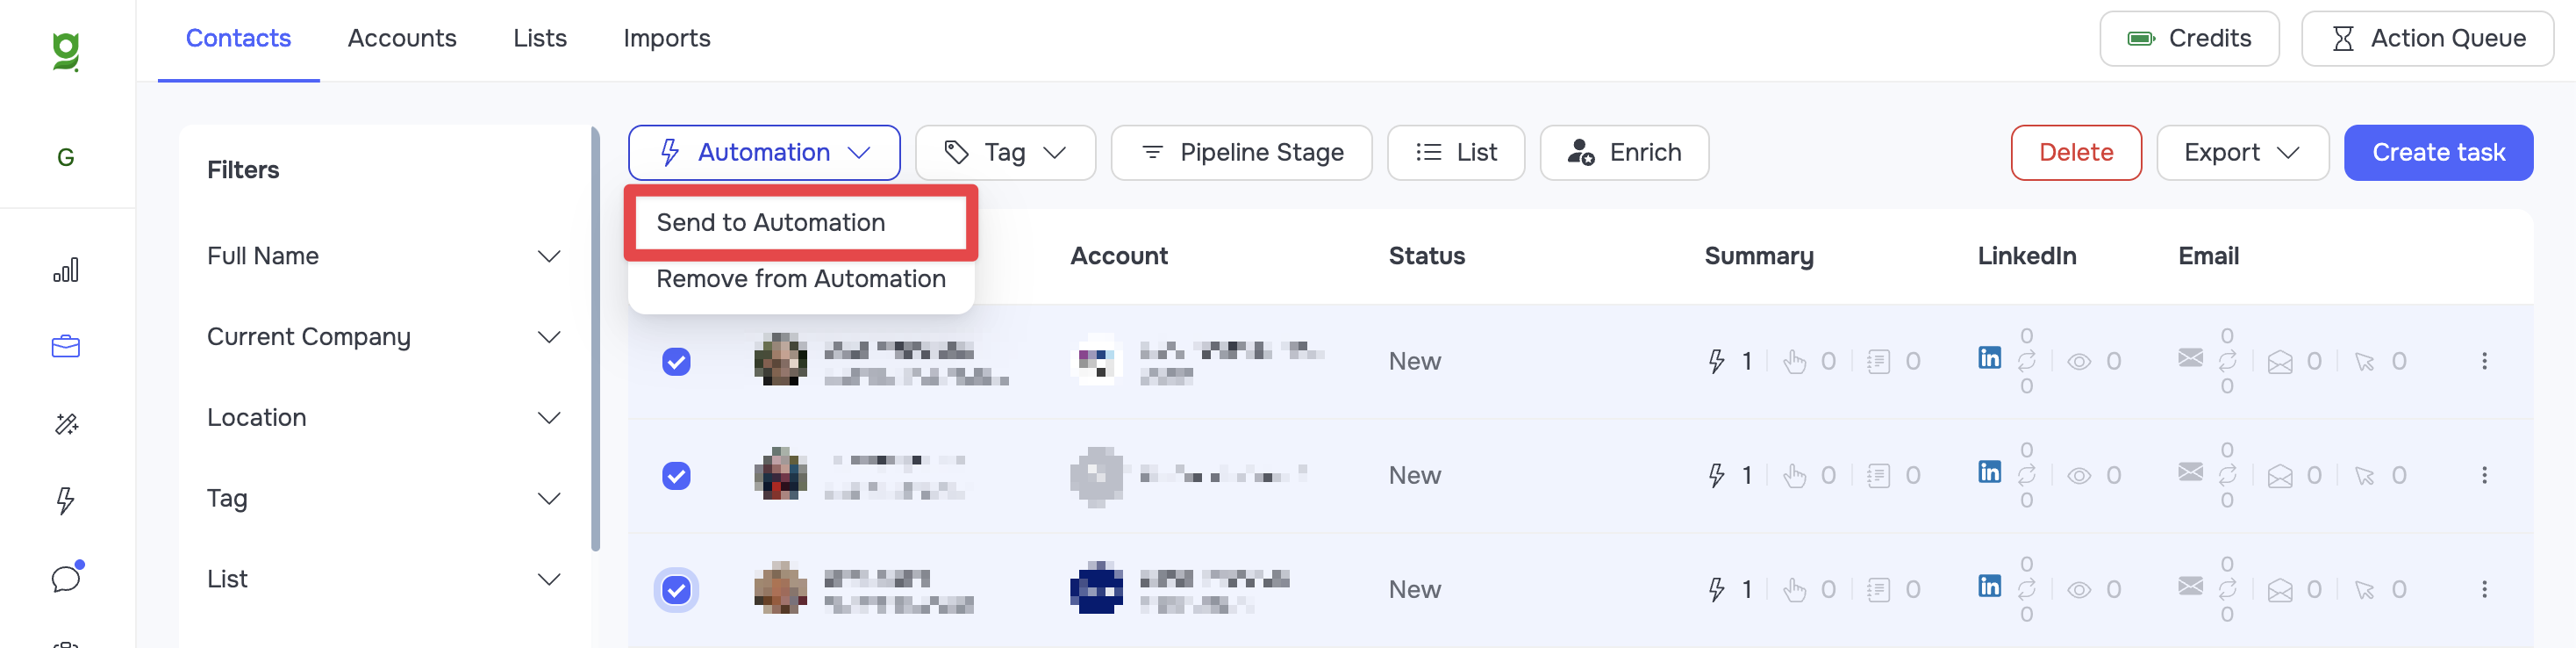
🟡 Note: When using this method, all selected contacts will be automatically added to the first segment only (Segment #1). If your automation has several segments and you plan to distribute the contacts differently, use manual adding through the Builder tab.
Removing (cancelling) contacts from an automation
If you need to stop interacting with certain contacts, the system lets you cancel their participation in the process at any moment. You can do this in several ways:
Bulk cancelling through the general CRM
The mechanics are exactly the same as for bulk adding:
-
Go to the Contacts section in the CRM.
-
Filter and select the contacts you need.
-
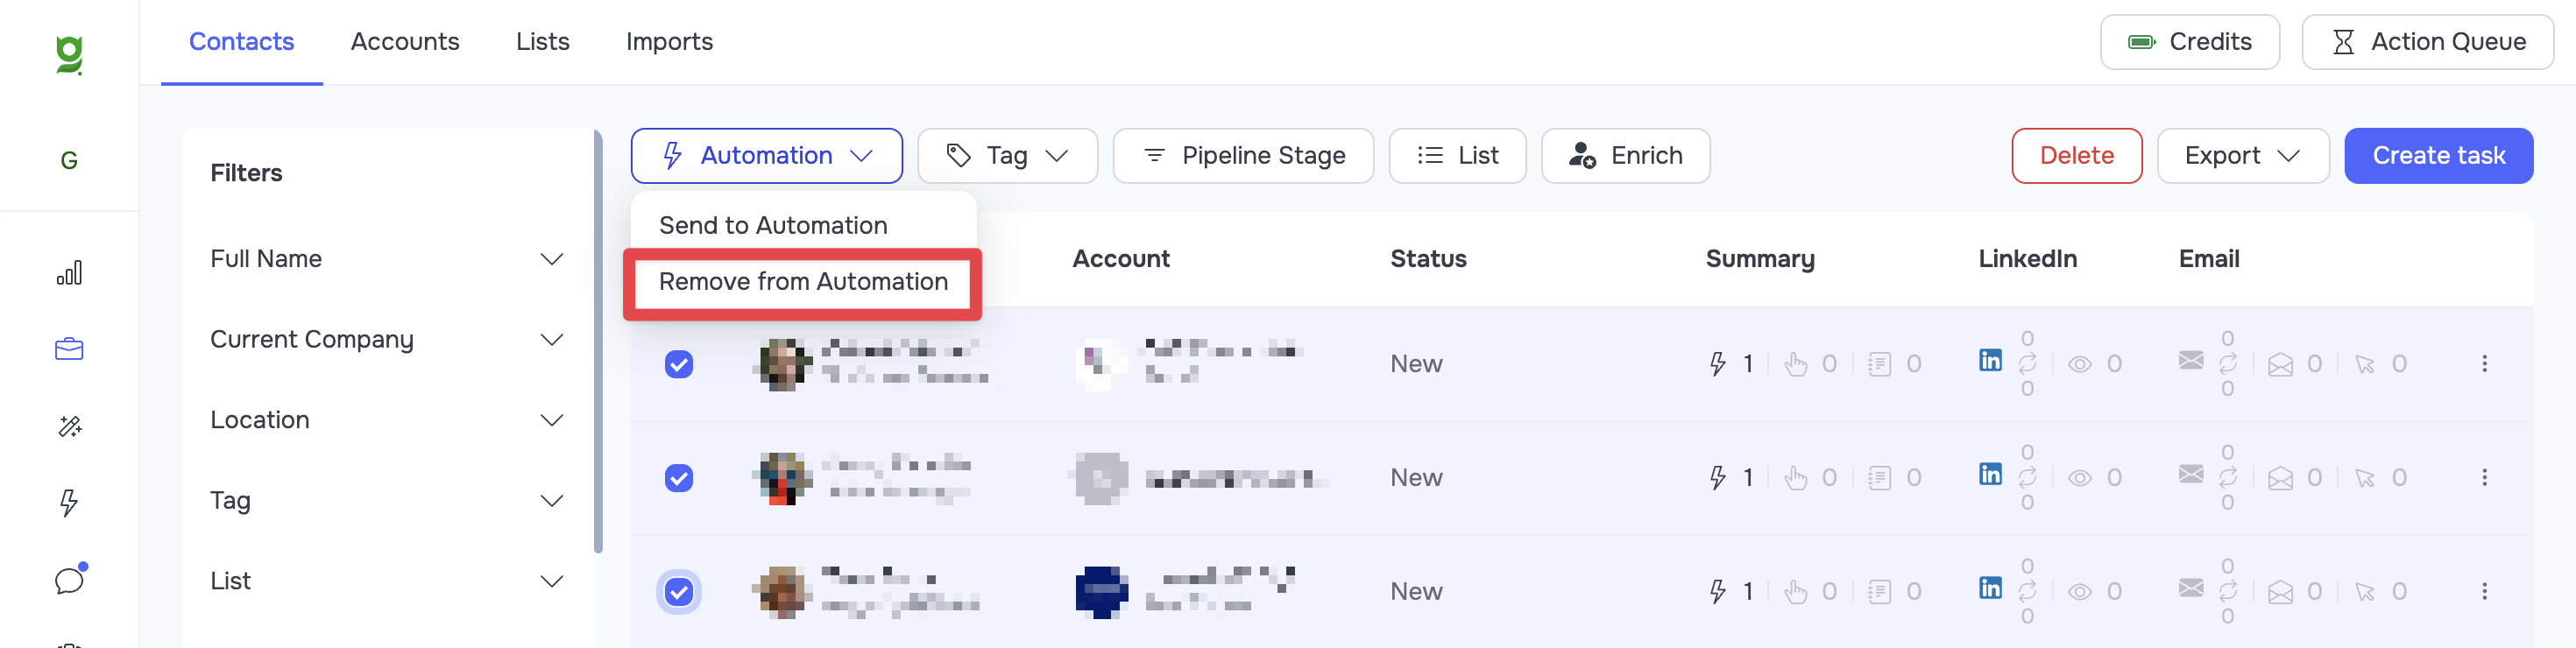
In the toolbar, click Automation and select Remove from automation.
-
Specify the automation you want to remove the selected contacts from.
Cancelling through the Contacts tab inside the automation
This is the most convenient way to manage participants in bulk within a specific automation.
-
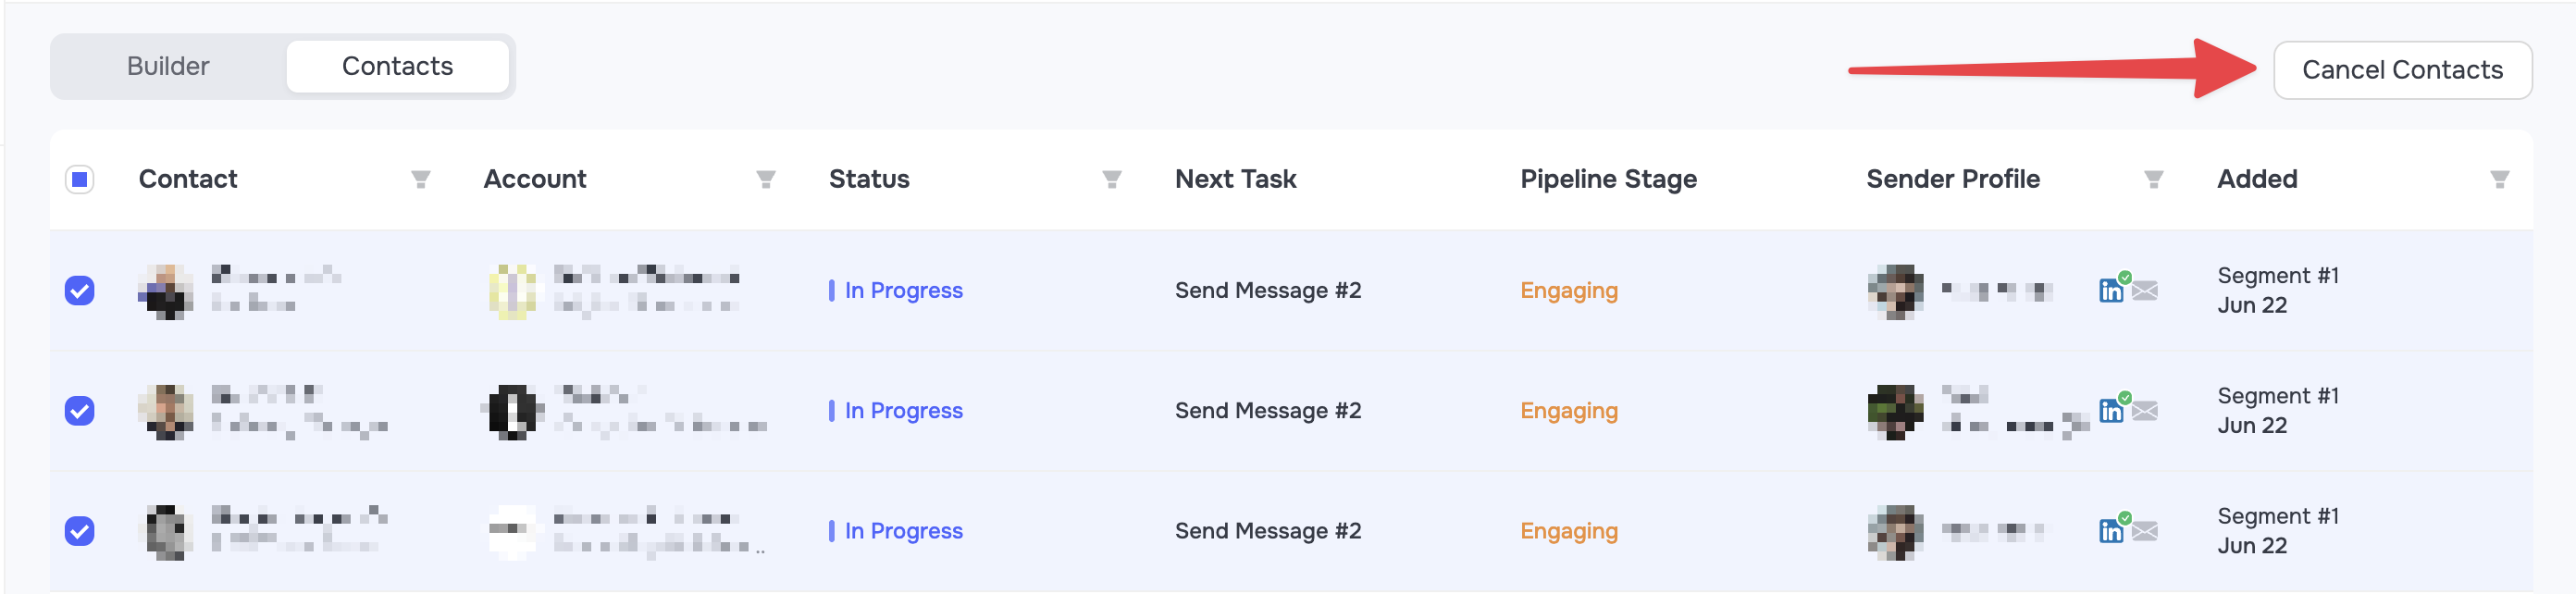
Open the automation and go to the Contacts tab.
-
Use the filters in the table to find the contacts you need.
-
Select them and click the Cancel Contacts button in the top control panel.
Targeted cancelling on a specific node
If you need to remove only the contacts that are currently waiting for a task to be performed on a specific node:
-
Open the automation in the Builder tab and find the node you need.
-
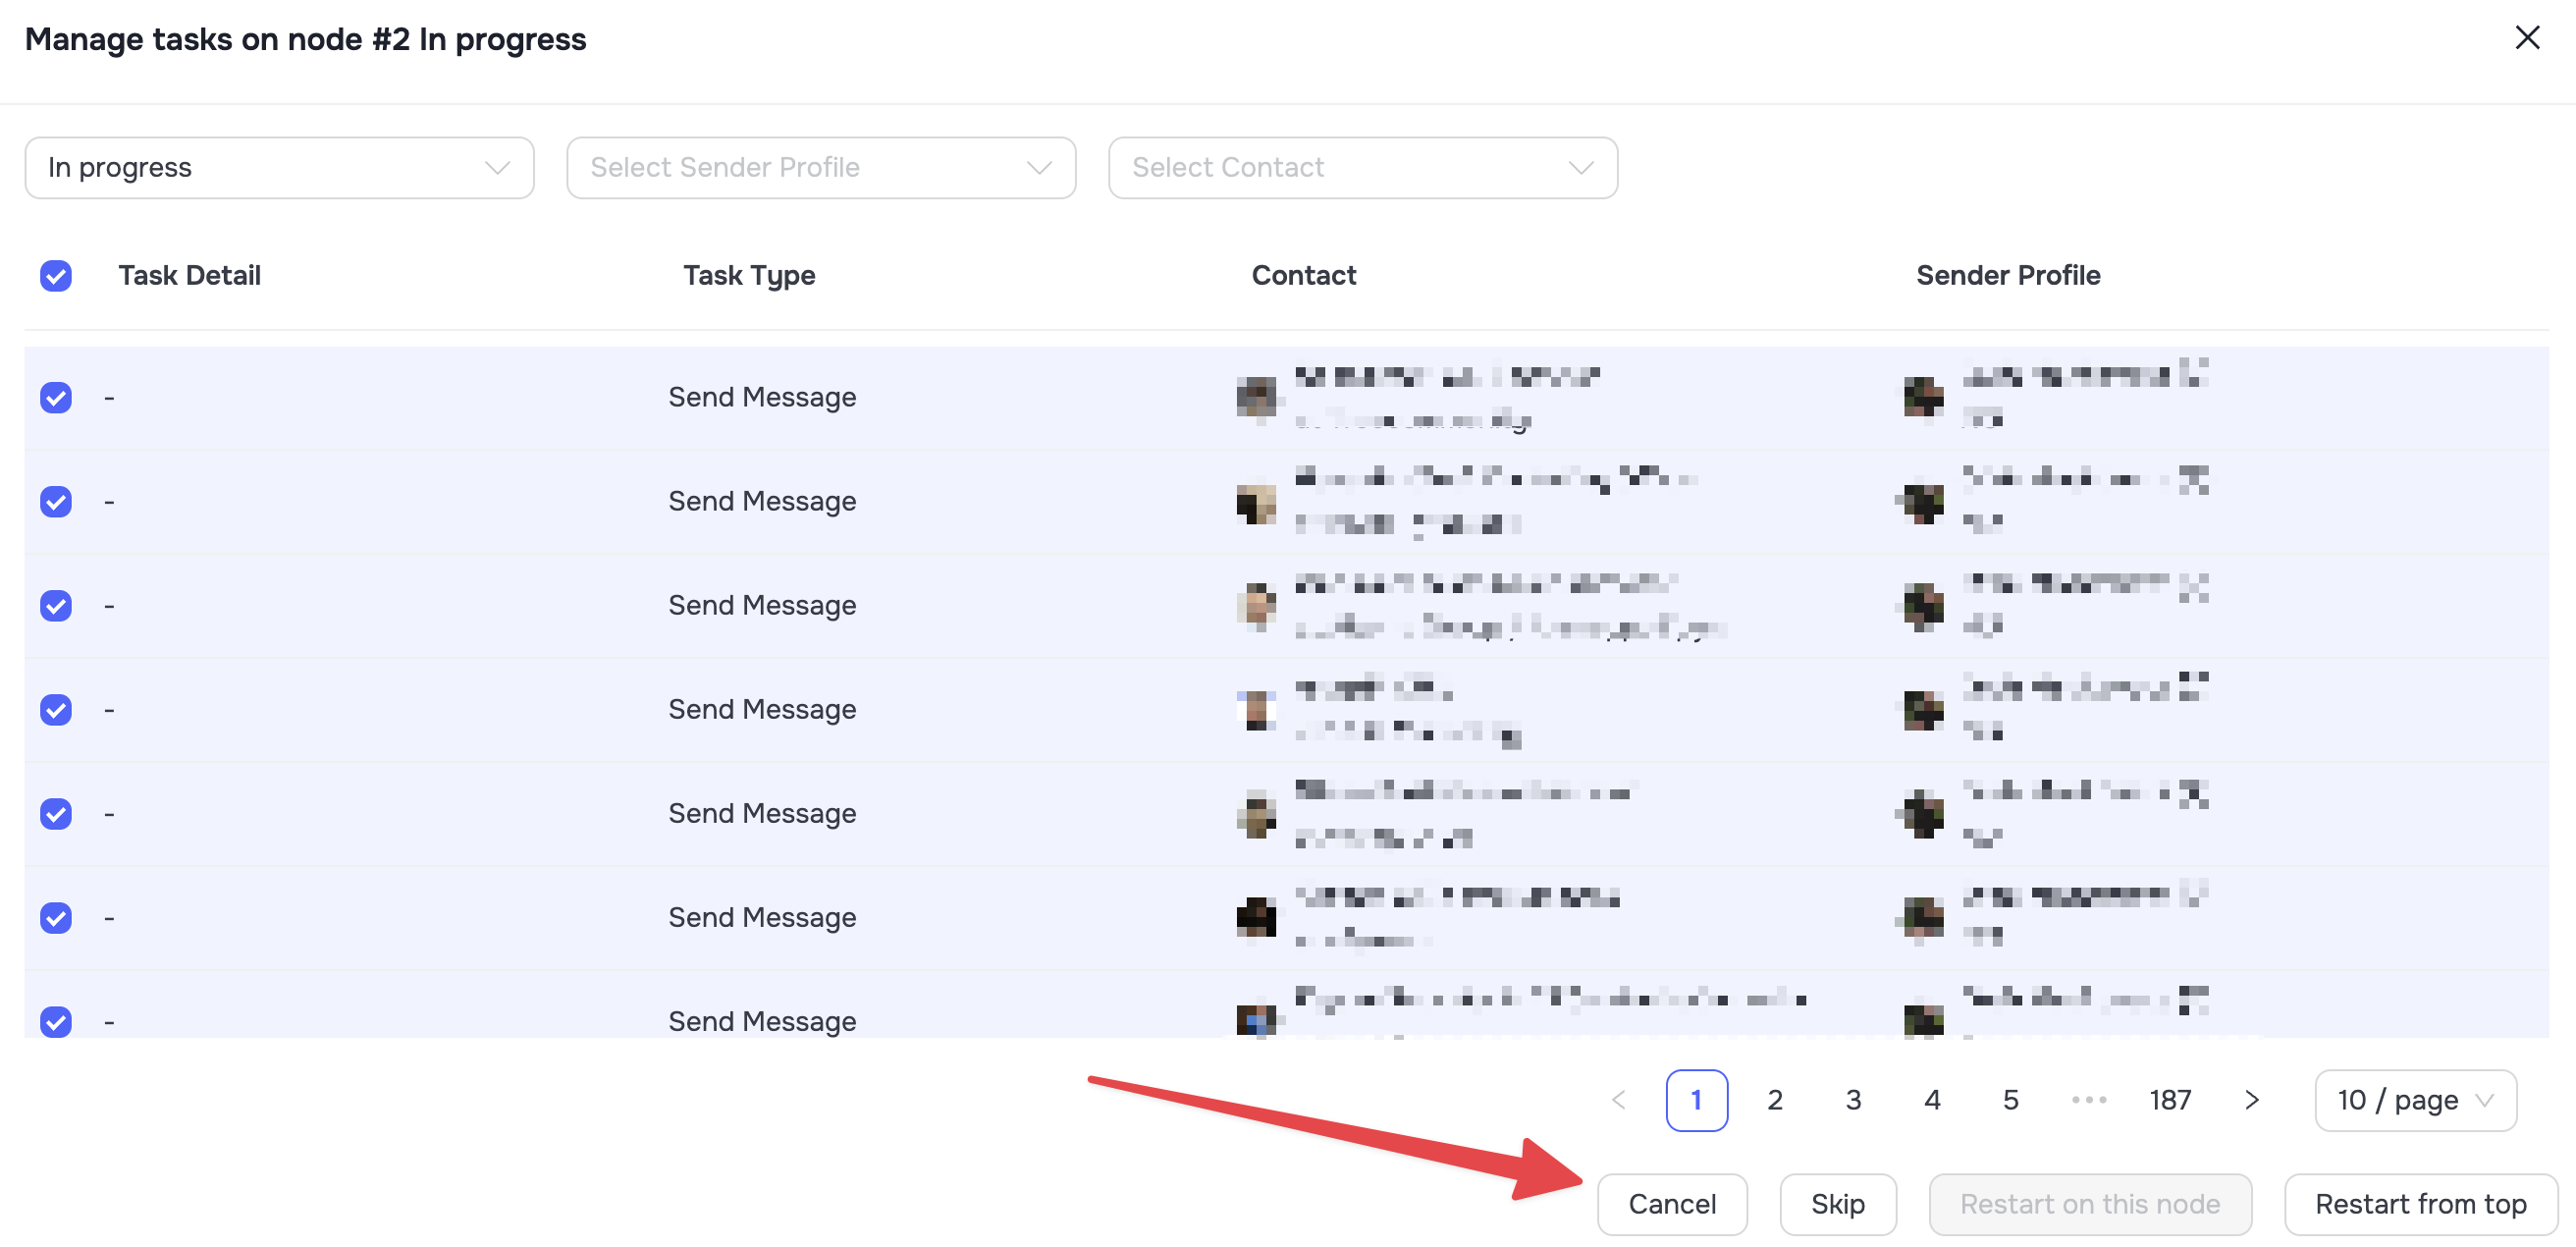
Click the clickable number next to the In progress status.
-
The modal window that appears will show a list of all contacts at this stage. Select the profiles you need and click the Cancel button.
Individual cancelling in the contact card
If you're reviewing the history of an individual contact and decide to stop their progress individually:
-
Open this contact's card.
-
In the workspace, go to the Automations tab.
-
Find the automation you need (in the Active block).
-
Click the three-dot icon (
...) next to the name and select Cancel automation.