Webhooks are a tool for automatically transferring data from your workspace to external systems (for example, to your CRM, Slack, or to orchestrator services like Make or Zapier) in real time, when a certain event occurs.
How to create a Webhook
To add a new integration, go to the general system settings (the gear icon on the left sidebar) and open the Webhooks section.
-
Click the Create webhook button in the top right corner of the screen.
-
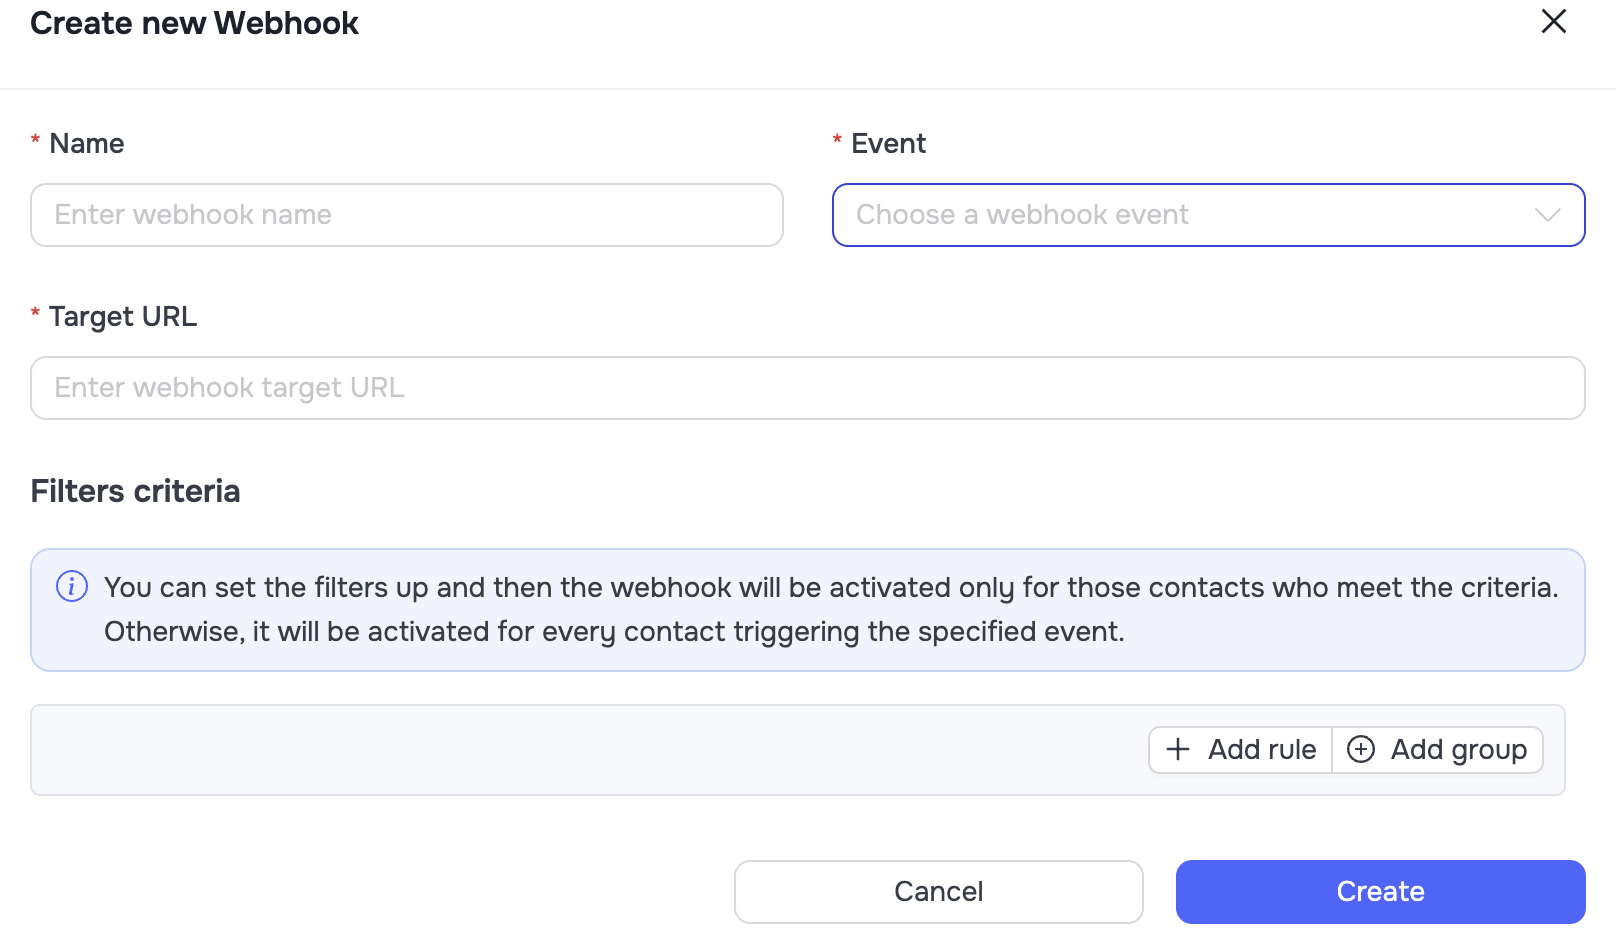
In the modal window, fill in the required fields:
-
Name: Enter a clear name for the webhook.
-
Event: Select the trigger event from the list that will start the data transfer (see the detailed list below).
-
Target URL: Paste the link to the receiving side (the URL of your application or a link generated by Make/Zapier/etc).
-
-
Filters criteria (Optional): You can add filtering rules (Add rule / Add group). If you set up filters, the webhook will trigger not for all contacts, but only for those that match the specified criteria.
-
Click Create to save the settings.
List of available triggers (Events)
When creating a webhook, you can select one of many system events for it to react to. They can be roughly divided into several categories:
-
Contact actions: Contact Enriched (the contact has been enriched with data), Contact Accepted LinkedIn Connection Request (the connection request was accepted), Contact Replied (a reply on LinkedIn, Email, or InMail).
-
Sender actions (Sender Profile): A successfully sent connection request (Sent LinkedIn Connection Request) or a message through any channel (Sent LinkedIn Message, Email, InMail).
-
System notifications: Sender Profile Run Issue (an error occurred with a sender profile).
-
Custom Call: Contact Export and Account Export.
🟡 Note: Unlike the standard triggers, Custom Call events are used to set up special Webhook Call nodes inside your automations (for more details on how they work, read the article [How to Setup Webhook Call]), as well as for bulk exporting contacts on request from the CRM - Contacts section (the Export - Webhook button).
Managing webhooks
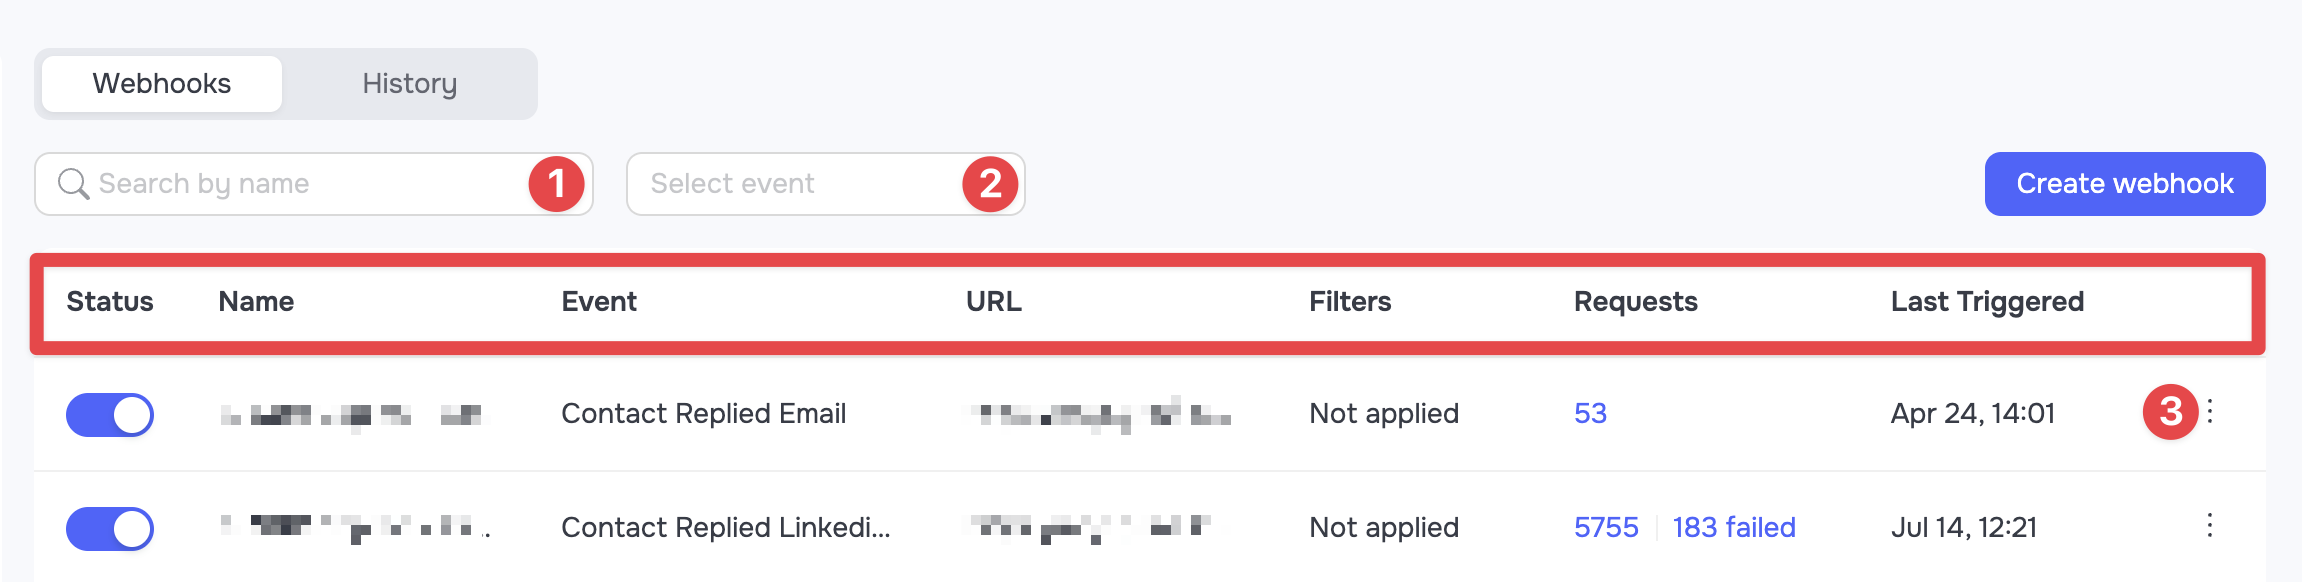
The main page of the section shows a table with all the webhooks you've created. For quick navigation, there's a search panel above the list: you can find the webhook you need by its name - the Search by name (1) field. Or filter the general list by a specific trigger - the Select event (2) dropdown.
At the right end of each row, there's an actions menu - the three-dot icon (3). It lets you:
-
Test: Send a test request to check whether the receiving side gets your data correctly.
-
Edit: Open the modal window for editing the webhook settings.
-
Delete: Permanently delete the webhook from the system.
Each row in the table contains comprehensive information about the webhook, split into the following columns:
-
Status: A toggle for quickly enabling or disabling the webhook without having to delete it.
-
Name: The webhook name you set.
-
Event: The trigger event that activates this webhook.
-
URL: The link to the receiving side (Target URL) where the data is sent.
-
Filters: Shows whether contact filtering rules are applied to this webhook.
-
Requests: Overall trigger statistics. It shows the number of both successful and failed requests.
-
Last Triggered: The date and time the webhook was last triggered.
History and logging (History)
Next to the main tab, there's the History tab. This is a system event log that records absolutely every trigger of your webhooks.
Here you can check the status of each request, see the webhook name and the event, and also view a detailed log (View log) to figure out the reasons for an error if the data wasn't delivered. The lists in the history can be filtered by webhook name, status, or date range.