The Messenger section is a centralized space for managing all your conversations with contacts. It brings together communication from all connected Sender Profiles, letting you work with messages in a single window without switching between different accounts.
Navigation and work areas
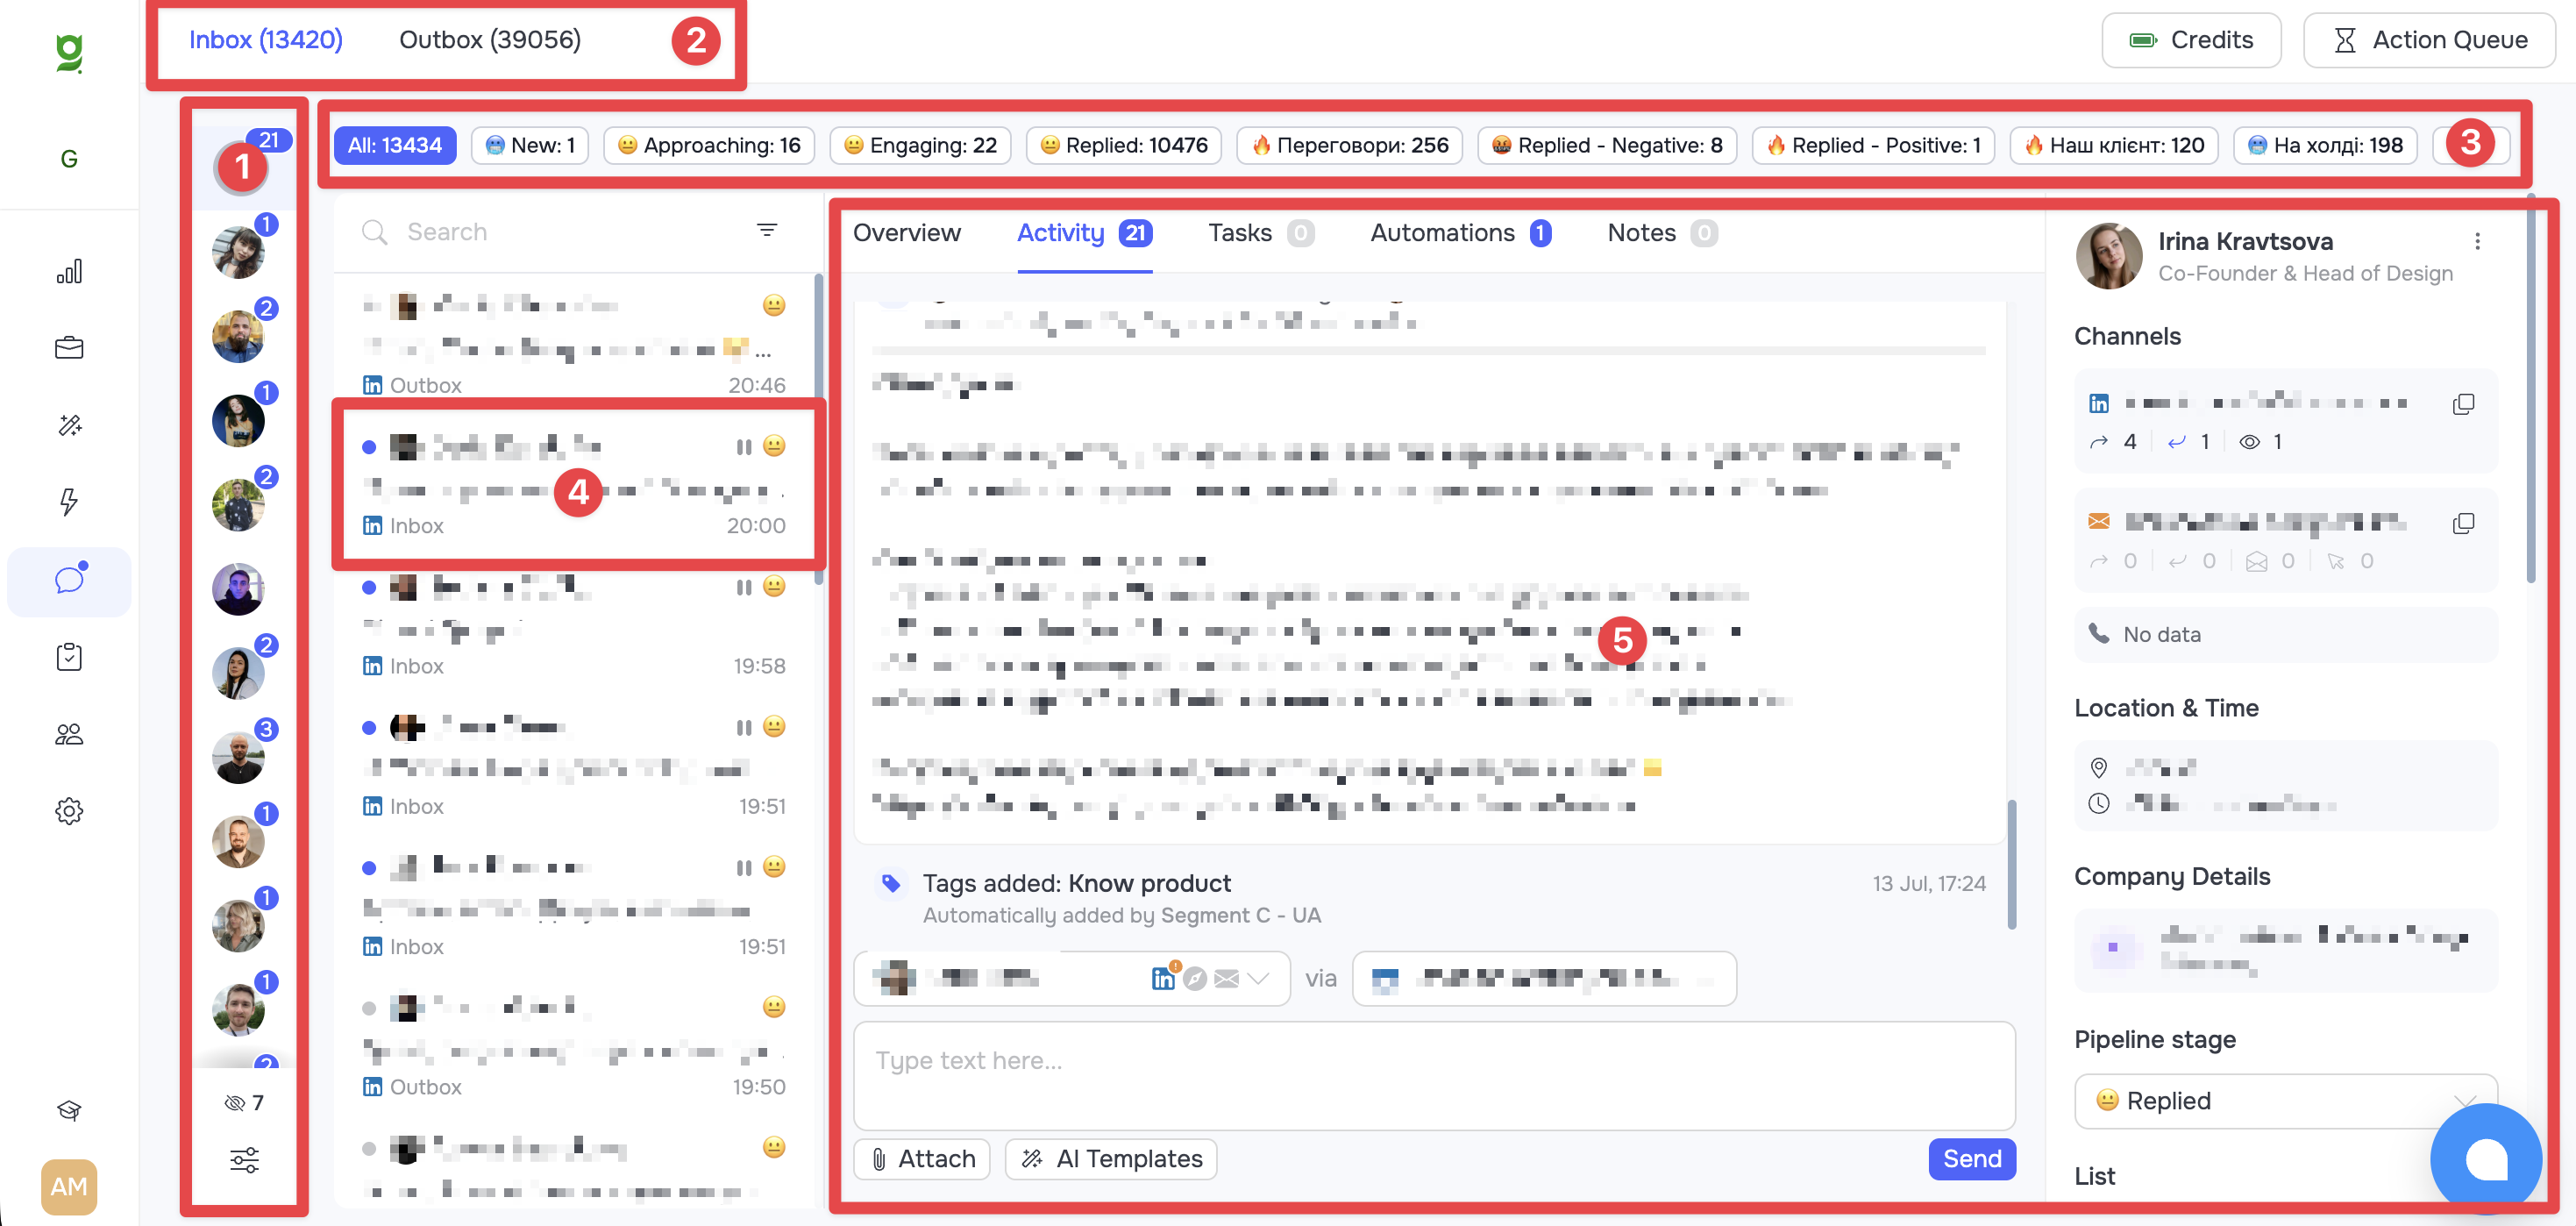
The messenger interface is divided into several functional areas:
-
Sender selection (1)
-
Inbox and Outbox (2)
-
Pipeline Stages (3)
-
Conversation indicators (4)
-
Contact info card and conversation area (5)
Sender selection (Left sidebar)
This is where all active Sender Profiles are shown. By default, All is selected, which shows conversations from every profile at once. You can click a specific profile to filter the correspondence by that profile only. If needed, you can hide profiles you are not currently using. To do that, click the sliders icon at the very bottom of the left sidebar and turn off the toggles next to the accounts you don't need.
🟡 Note: The messenger only shows conversations with contacts that have been loaded into the CRM. If you have a conversation with a contact on LinkedIn but they were not imported into the internal CRM, that conversation will not appear in the messenger.
Inbox and Outbox
-
Inbox: Shows conversations that have an incoming message from the contact.
-
Outbox: Shows conversations with outgoing messages only (or where no reply has been received yet).
Pipeline Stages (Top panel)
Above the conversation list, there are clickable pipeline stage buttons. By clicking them, you can quickly filter conversations by a specific stage.
Conversation indicators
In the conversation list itself, each contact has a short visual indicator to help you get your bearings quickly:
-
Blue dot: Means the conversation has unread messages.
-
Pause symbol: Indicates that the automation has been stopped for this contact (status Automation paused after reply).
-
Stage emoji: Shows the current Pipeline Stage category the contact belongs to (Positive, Negative, Engaging, Cold, etc).
-
Time indicator: Displays the exact time the last message was sent or received.
Filtering conversations
Besides quick filtering via Pipeline Stages, you can use the conversation search field by the contact's full name (1) or the deep search features - the filter icon (2).

Filtering includes searching by the following parameters:
-
Automation: By a specific automation.
-
List: By the list the contacts are saved in.
-
Tag: By assigned tags.
-
Channels: By communication channel (LinkedIn, InMail, Email).
-
Last Message: By the type of the last message (sent by you or received from the contact).
-
Show unreads: Show unread conversations only.
-
Show paused after reply: Show conversations with contacts in the Automation paused after reply status.
-
View Contacts in CRM: Open the filtered contact list directly in the CRM - Contacts section.
Working with messages
The central part of the screen is the interaction timeline. If communication runs through several channels (for example, Email and LinkedIn), all messages will appear in a single feed in the order they were received.
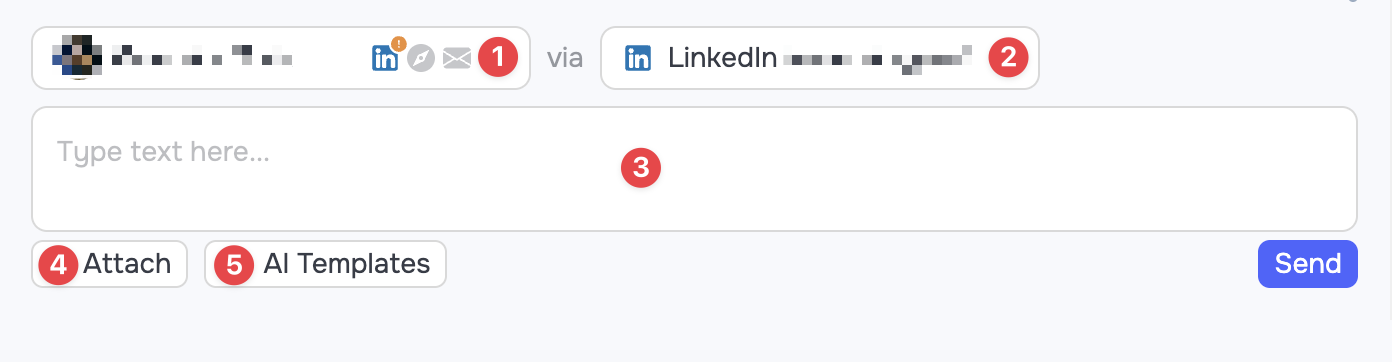
Text input window options:
-
Sender selection (1): Choose which profile the message will be sent from.
-
Channel selection (2): Choose the sending channel: LinkedIn, Email, InMail, or simply create an internal note (Note) that will not be sent to the contact.
-
Text input area (3): Type or paste the text you plan to send to the contact here
-
Using templates (4): You can insert prepared text templates.
-
Attaching files (5): The option to add documents or images.
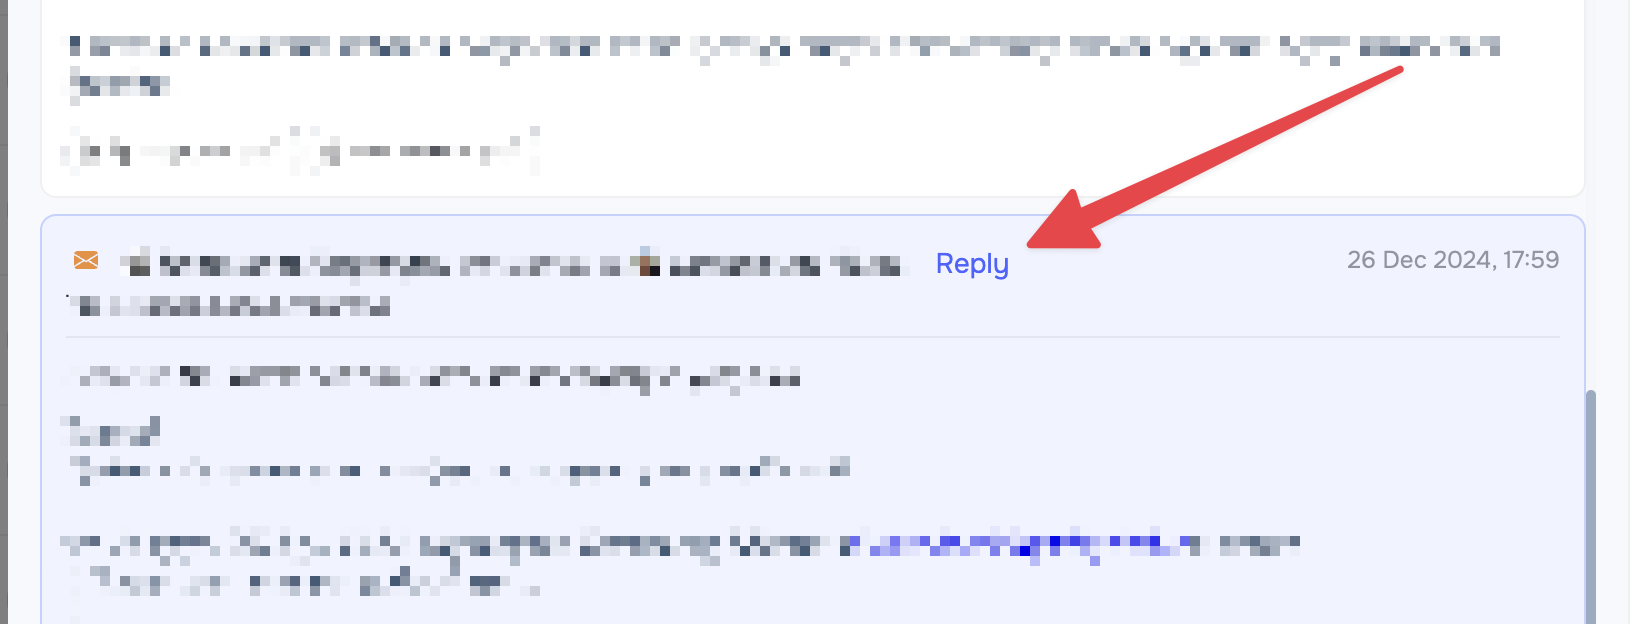
🟡 Note: If you are communicating by email and want to reply within the same thread, find the message you need in the conversation history and click the Reply button in that message's header. The system will automatically build the subject line and pull the previous correspondence into the input window. Start writing your new reply right below the subject.
Do not delete or edit the quoted email history inside the input window. This contains technical threading data required by email providers. After sending, this history will be hidden, and the recipient will see a perfectly correct message.
Contact management menu
In the top-right corner (next to the contact's name and job title on the sidebar), there is a three-dot icon. Clicking it opens the quick actions menu for managing the contact.
Available actions:
-
Take the contact off pause (Unpause automations).
-
Remove the contact from the current automation (Remove from automation).
-
Mark the last message as unread (Mark as unread).
-
Export the contact's data via webhook (Export webhook).
-
Add to the stoplist (Add to stoplist).
-
Delete the contact from the CRM completely (Delete).
Contact info card
When you open any conversation, the work areas around it (the right sidebar with brief information about the lead and the top panel for switching between tabs) essentially fully duplicate the interface and functionality of the Contact card. This lets you review history, leave notes, and work with the contact without leaving the messenger.
A detailed breakdown of all the tabs and options of this panel is described in a separate article [Contacts & Accounts CRM Cards Overview].