Custom Tracking Domain (CTD) - is your own subdomain used to track email opens, link clicks, and redirects to the unsubscribe page.
Preparation for Setup
Before you begin:
- Get access to your domain's DNS control panel.
- Choose a name for your subdomain.
🟢 Tip: Common subdomain names include: track, email, click, trail, etc.
🟡 Important: Do not use your main domain for tracking. This may cause conflicts with your website's operation. Use only a subdomain.
🟥 DO NOT USE: yourdomain.com
🟩 CAN BE USED: click.yourdomain.com
Step 1. Creating a Record in the DNS Panel
You need to create a special record that will point your subdomain to Grinfi.
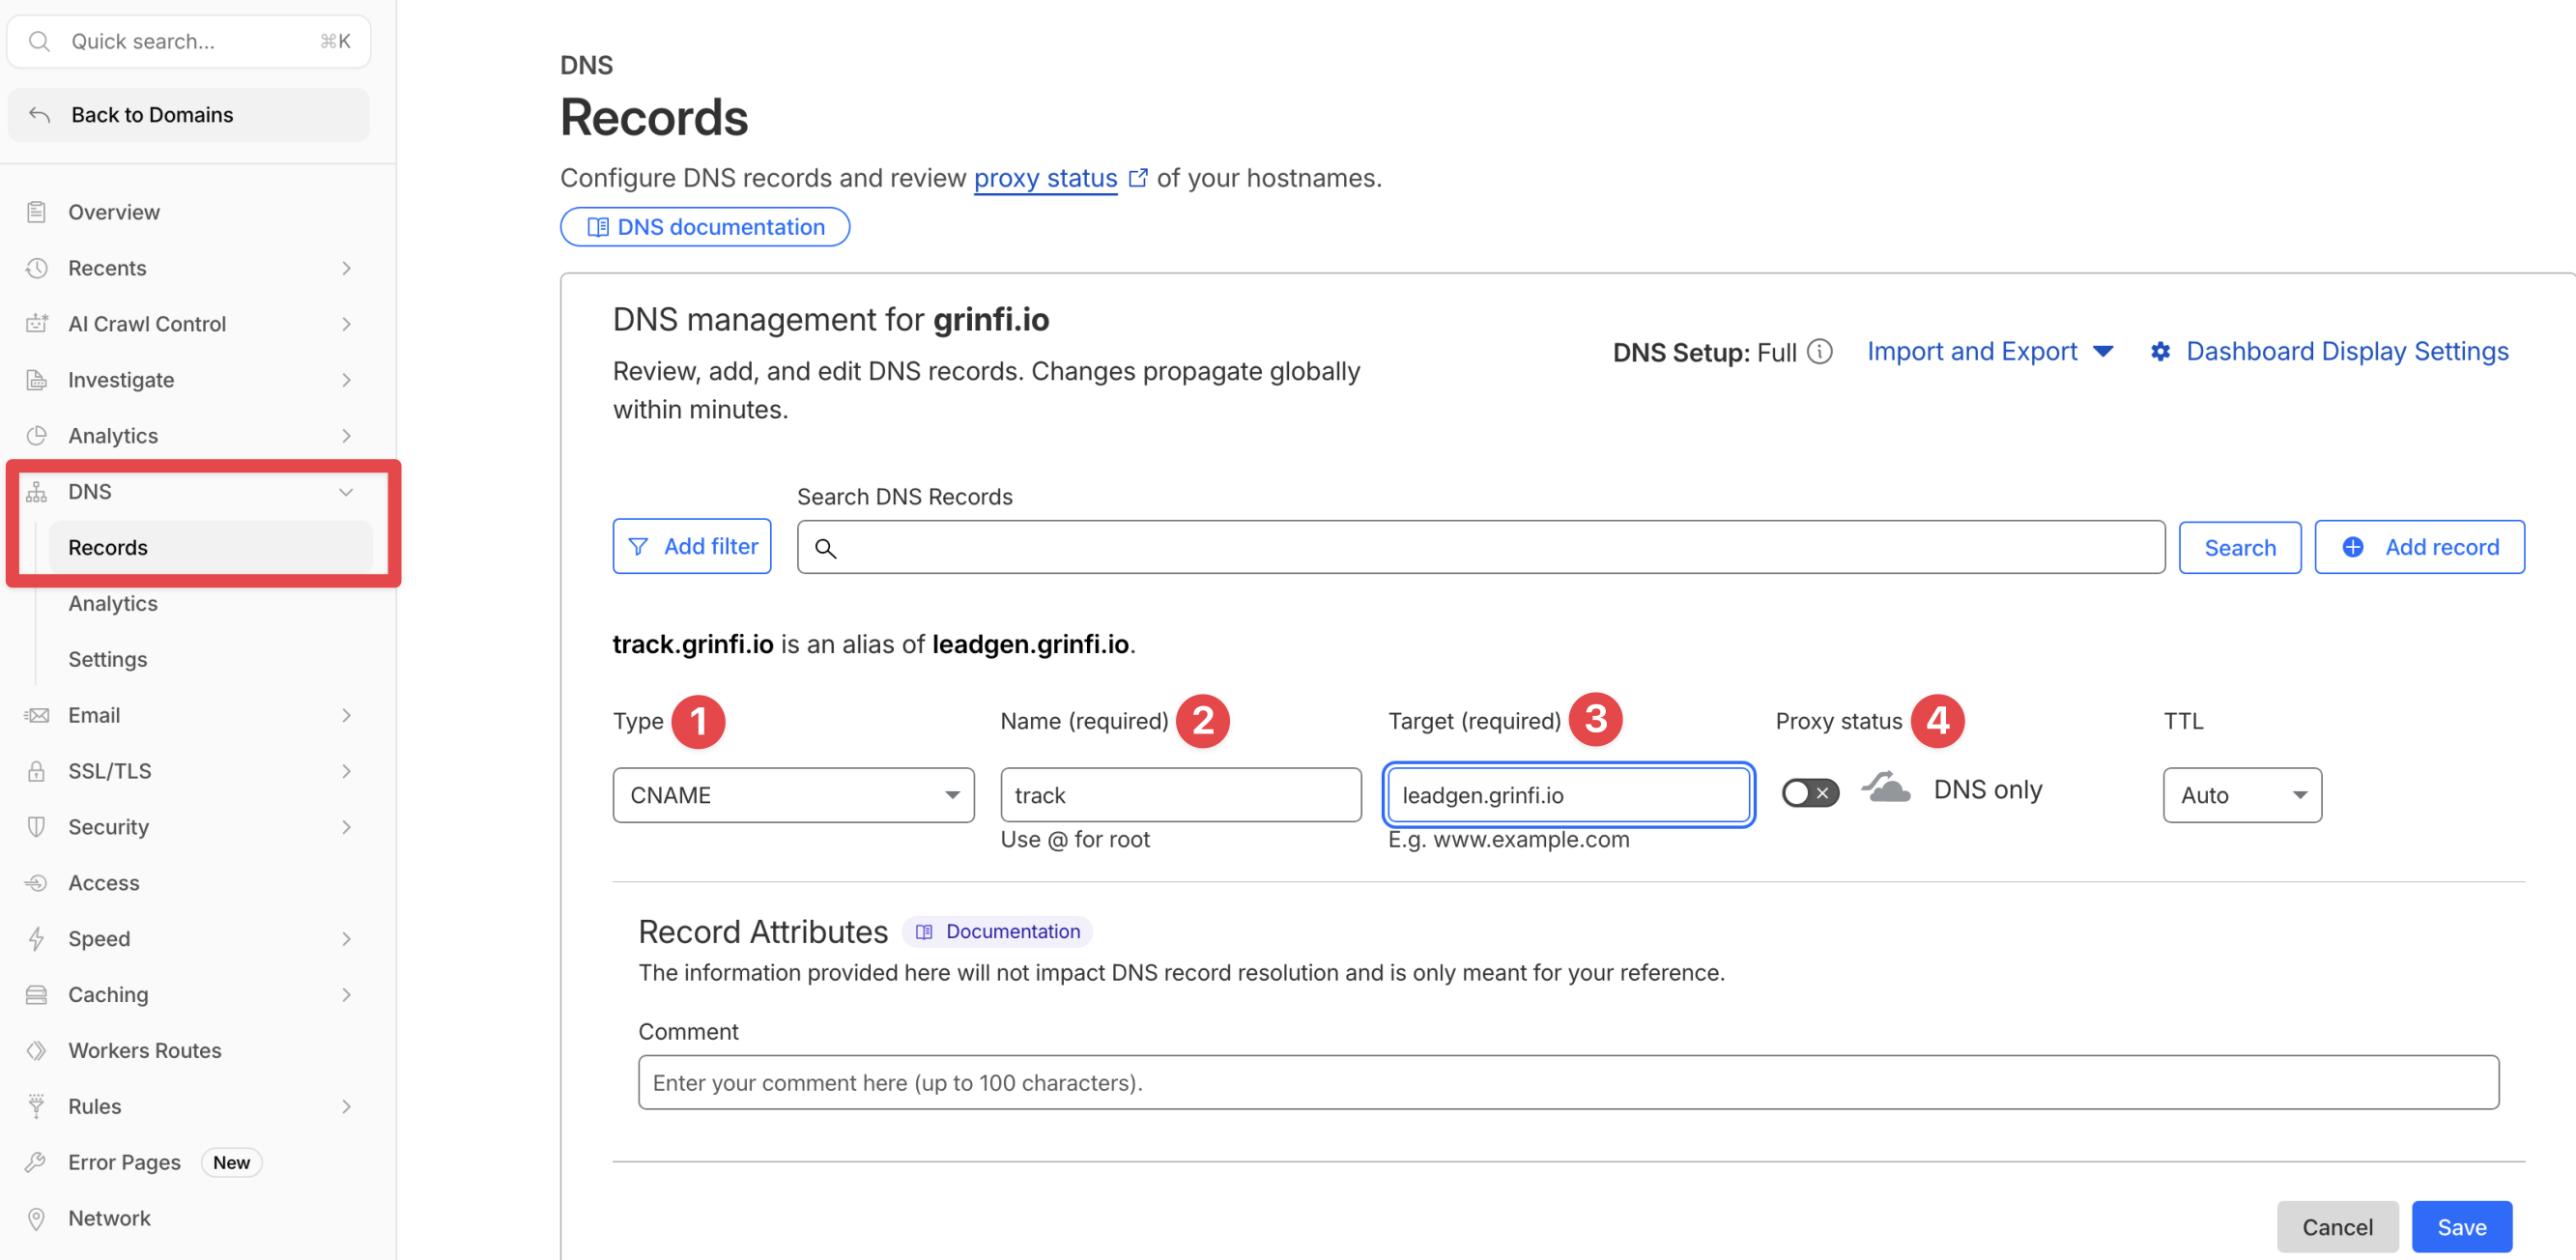 Create a CNAME record with the following parameters:
- Type (1): CNAME
- Name (or Host) (2): your subdomain name
- Target (or Value/Content) (3):
leadgen.grinfi.io - Proxy Status (4): Disabled (DNS only).
🟡 Note: If you are using Cloudflare, ensure that the Proxy (4) toggle is turned off (grey cloud icon). Otherwise, the domain will fail verification or function incorrectly.
Step 2. Adding CTD in Grinfi
After creating the DNS record, it must be linked to your email account within the Grinfi interface.
🟡 Note: DNS updates depend on your provider and may take from 15 minutes to 48 hours. Please wait until the changes are applied.
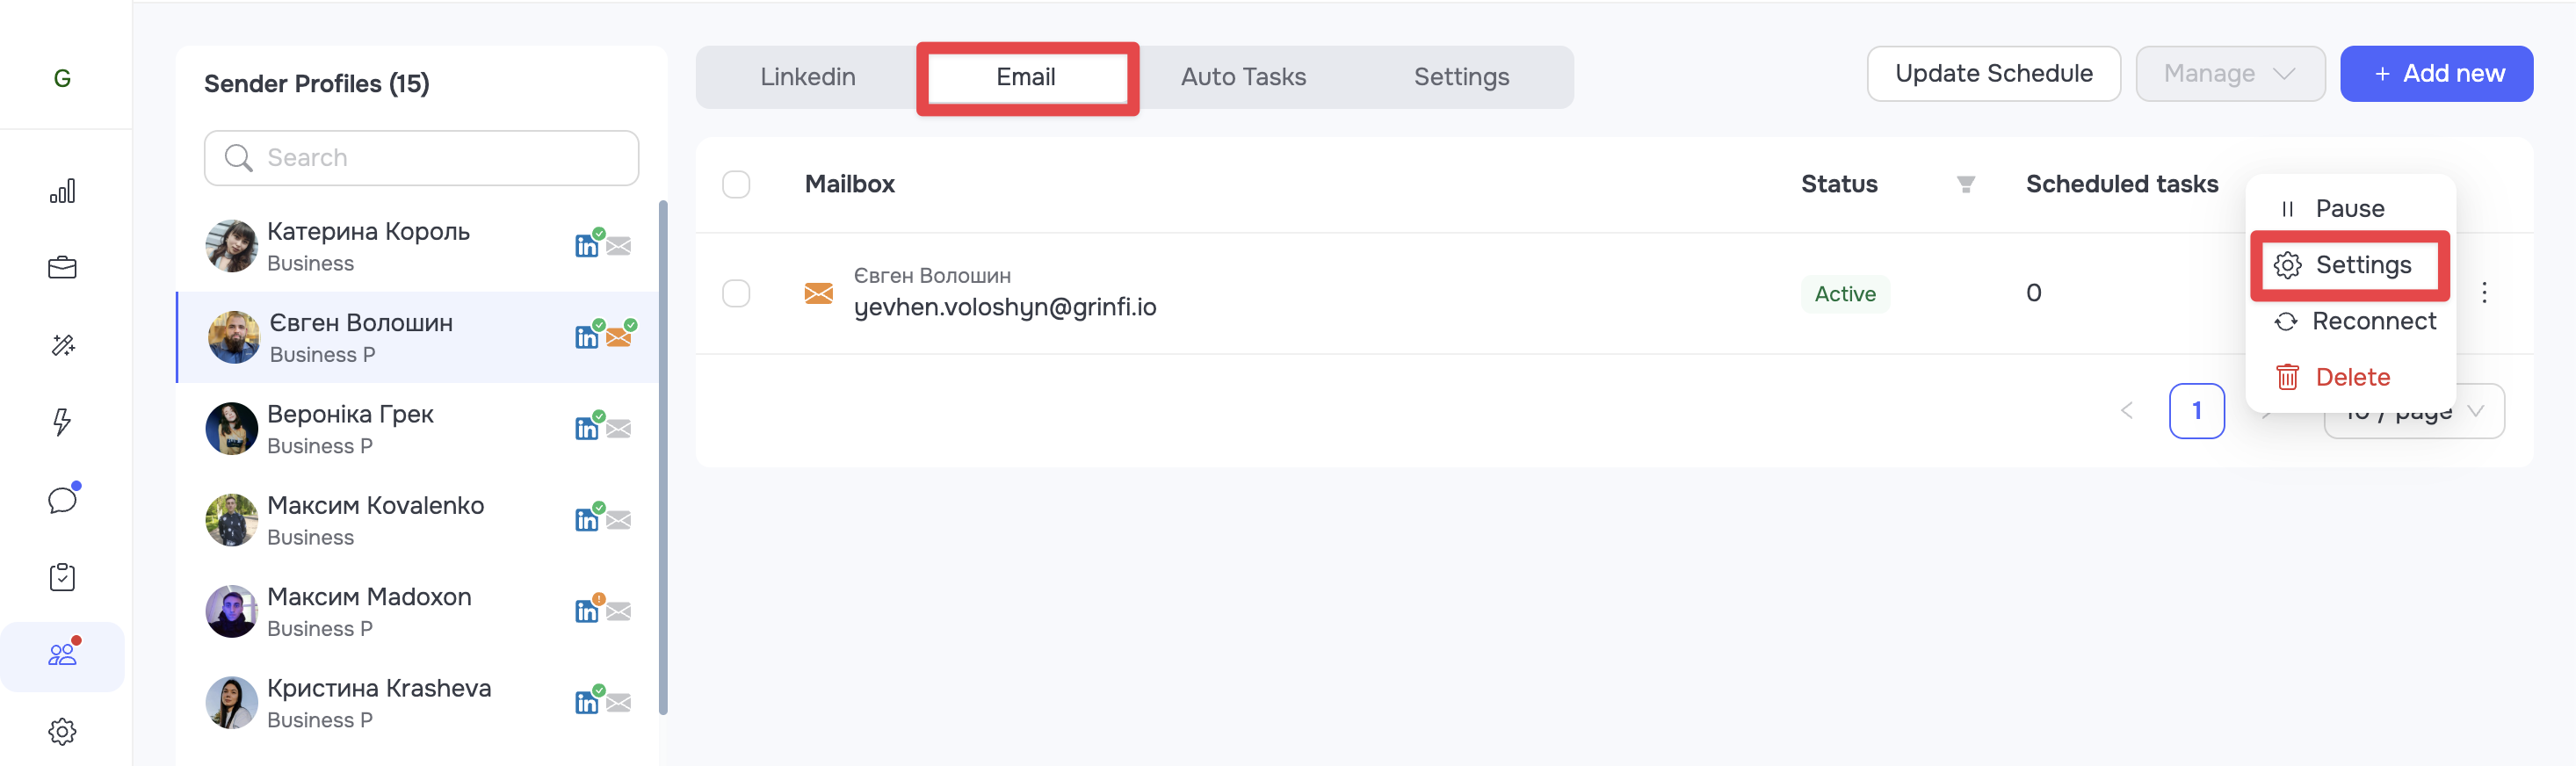
- In the Sender Profiles section, select the required profile and switch to the Email → Settings tab.
 - Go to the Custom Tracking Domain section and enter your full subdomain (1). Click Save (2).
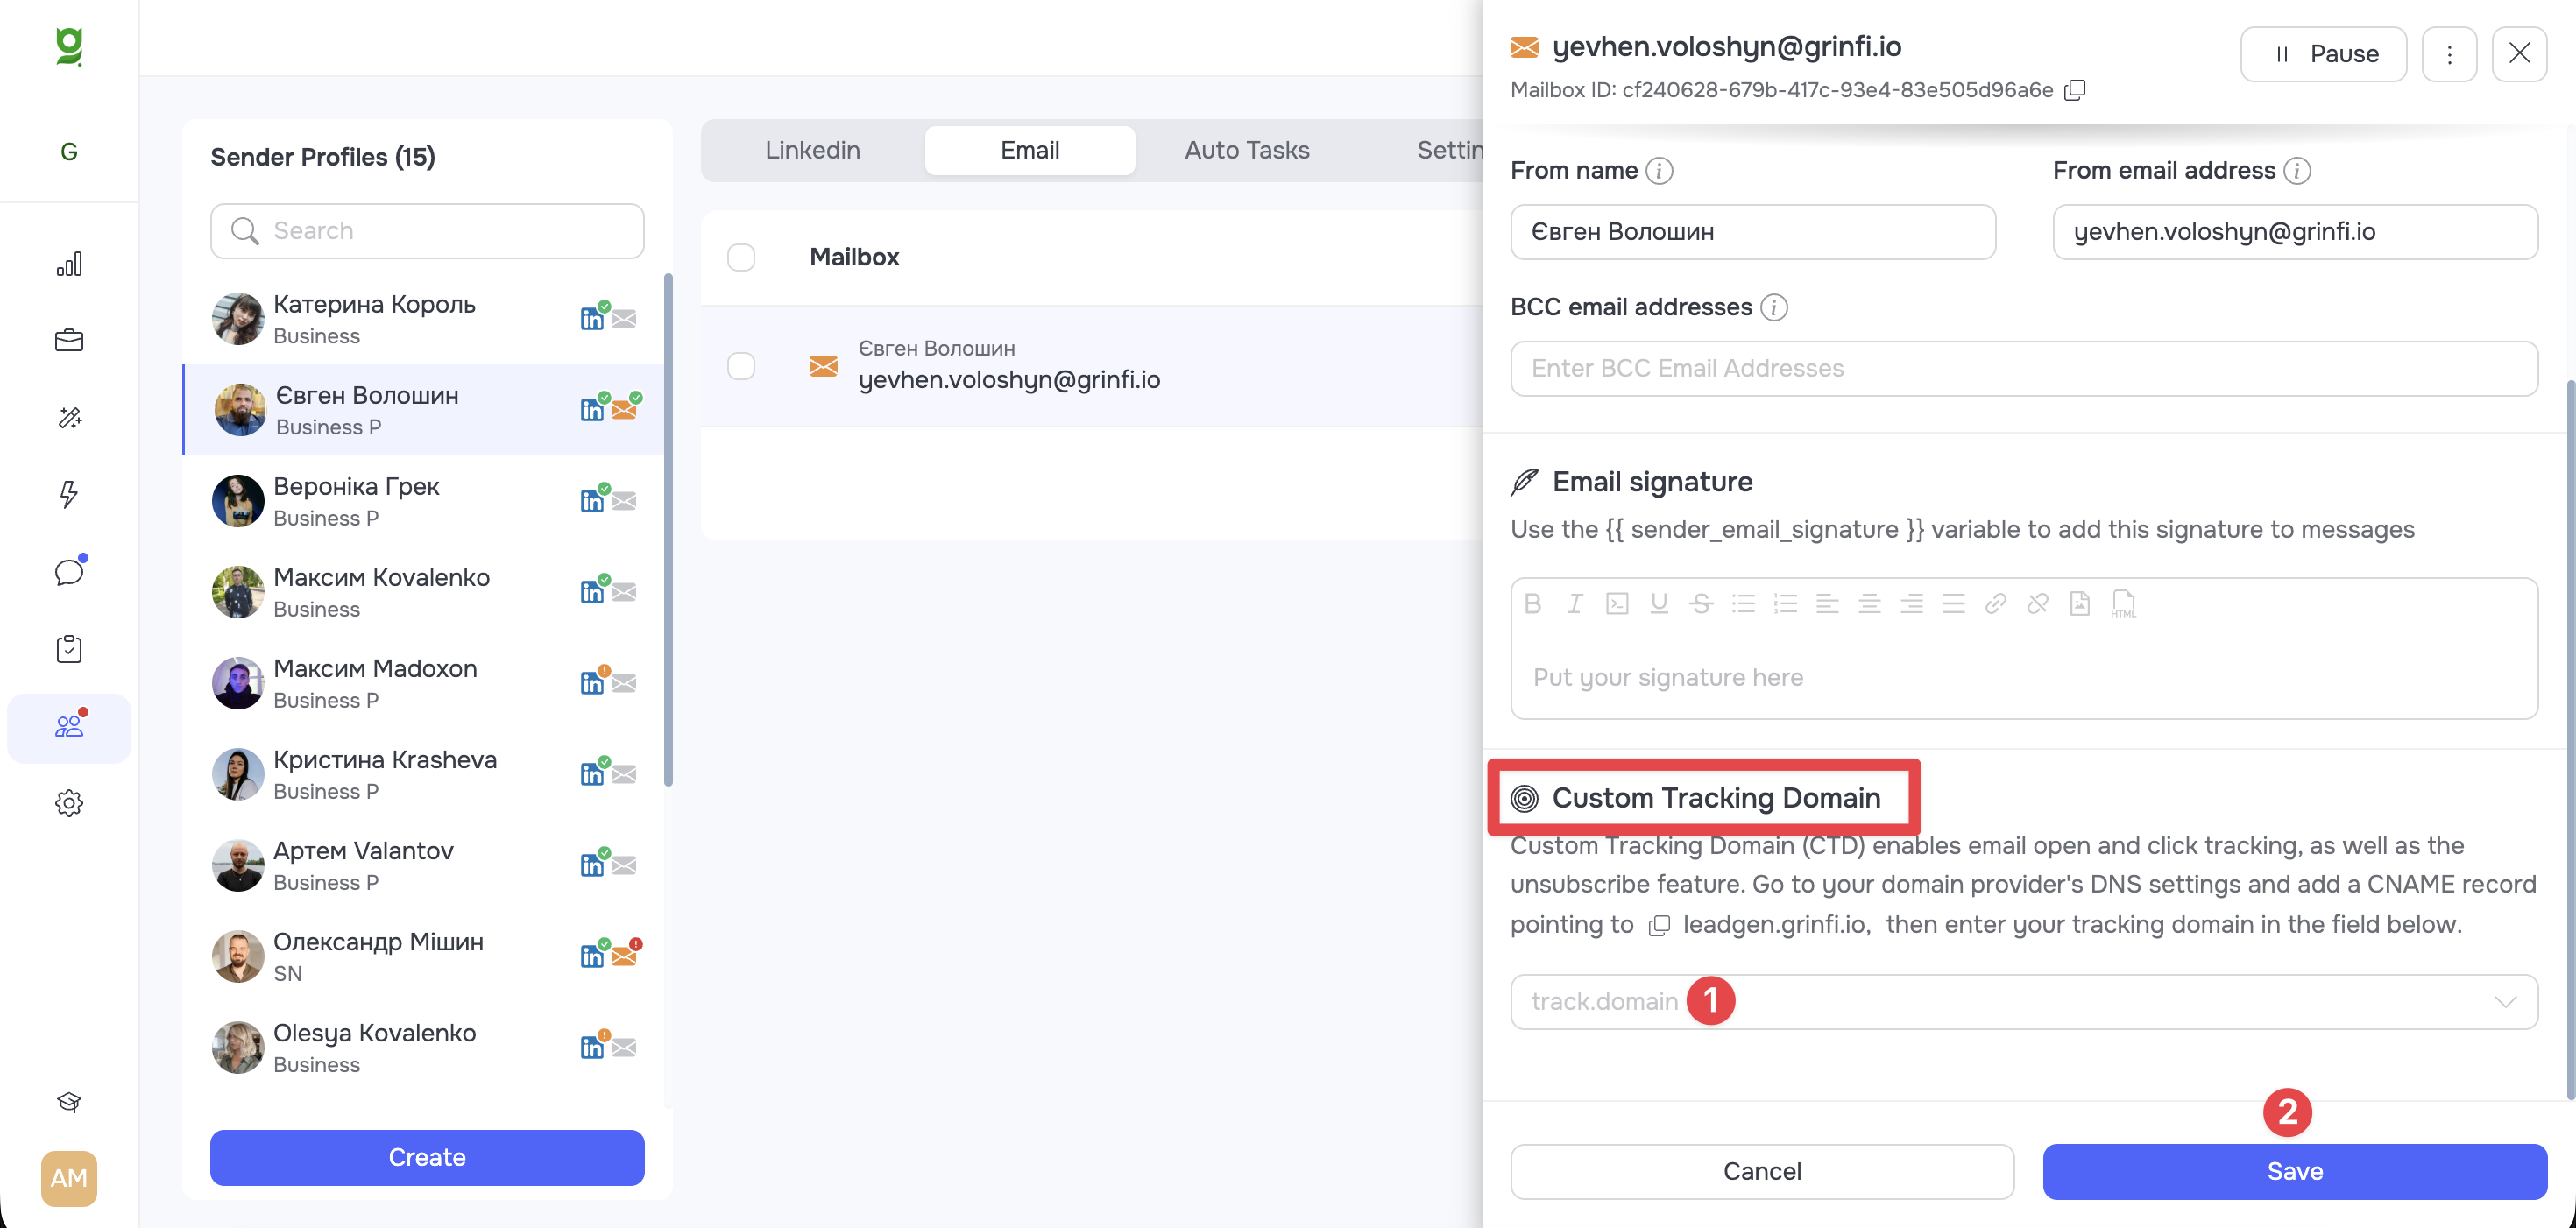 🟡 Note: CTD settings are not applied automatically to the entire profile. You must specify the created subdomain separately for each email account where you want to enable tracking.
Setting an Unsubscribe Link (Optional)
To give recipients the option to unsubscribe from your emails, you need to add a special variable to your email text. This can be done in two ways:
Option 1: Direct link
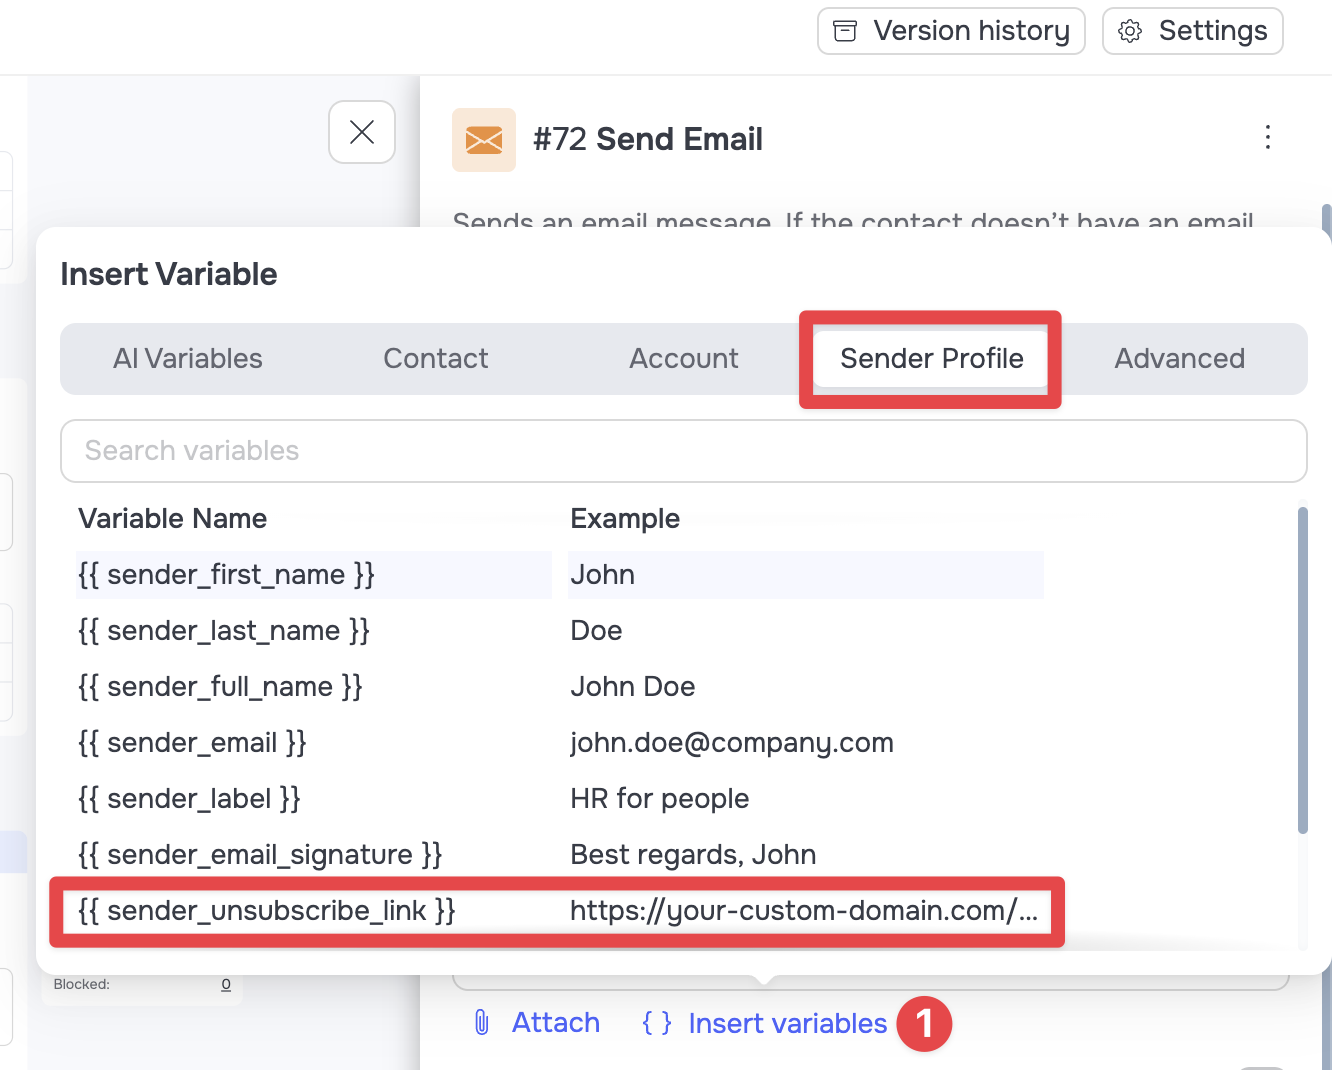
In the automation builder's text editor, click the Insert variables (1) button and select #{{ sender_unsubscribe_link }}. Paste the variable into the desired place in the text.
Option 2: Using HTML
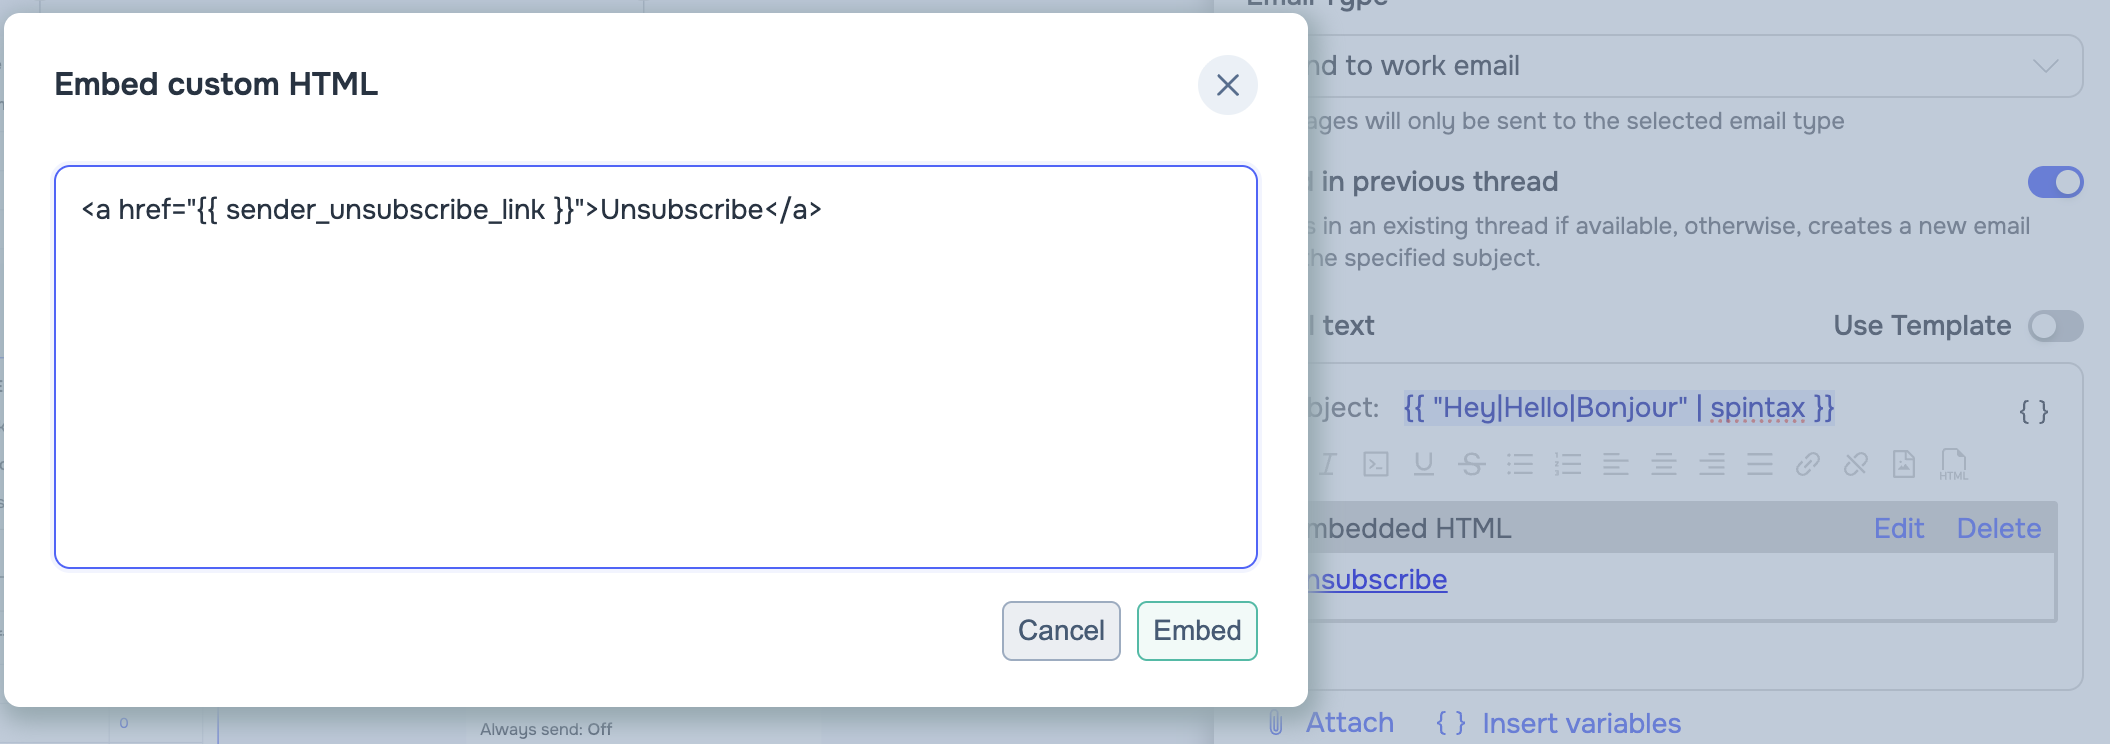
If you want to hide a long link behind clean text (e.g., the word "Unsubscribe"), use a standard HTML tag: <a href="#{{ sender_unsubscribe_link }}">Unsubscribe</a>
You can also freely use any custom HTML code (add styles, colors, turn it into a button, etc).
The main rule is to place the #{{ sender_unsubscribe_link }} variable inside the href attribute of your custom tag.