The Rotate Sender Profile node lets you automatically change the sender profile for a specific contact and return them to the very beginning of the automation (following a closed-loop principle) so that they go through the same scenario again.
Differences from other sender-changing nodes
It is important to understand the difference between this node and similar functional blocks:
-
Change Sender Profile: Changes the sender, but requires building a completely new logic branch directly under this node.
-
Send to Automation: Sends the contact to another automation where its own separate algorithm is configured. Using this function does not cancel or stop the current automation for the contact. If the branch continues directly under this node, the contact will keep performing the next tasks in parallel.
-
Rotate Sender Profile: Changes the sender and forcibly returns the contact to the start of the current automation, making them repeat an identical chain of actions (for example, trying to send a connection request again, but this time on behalf of a different colleague's profile).
Preparing for setup
For the node to work correctly, you need to configure the right algorithm when creating the automation. In the Default Sender Profiles settings block, be sure to set the Rotate to a new Sender Profile distribution method. This is the only condition that guarantees the system will pick a new sender profile on each subsequent rotation, eliminating the risk of reaching out from a previously used profile.
Configuring the Rotate Sender Profile node
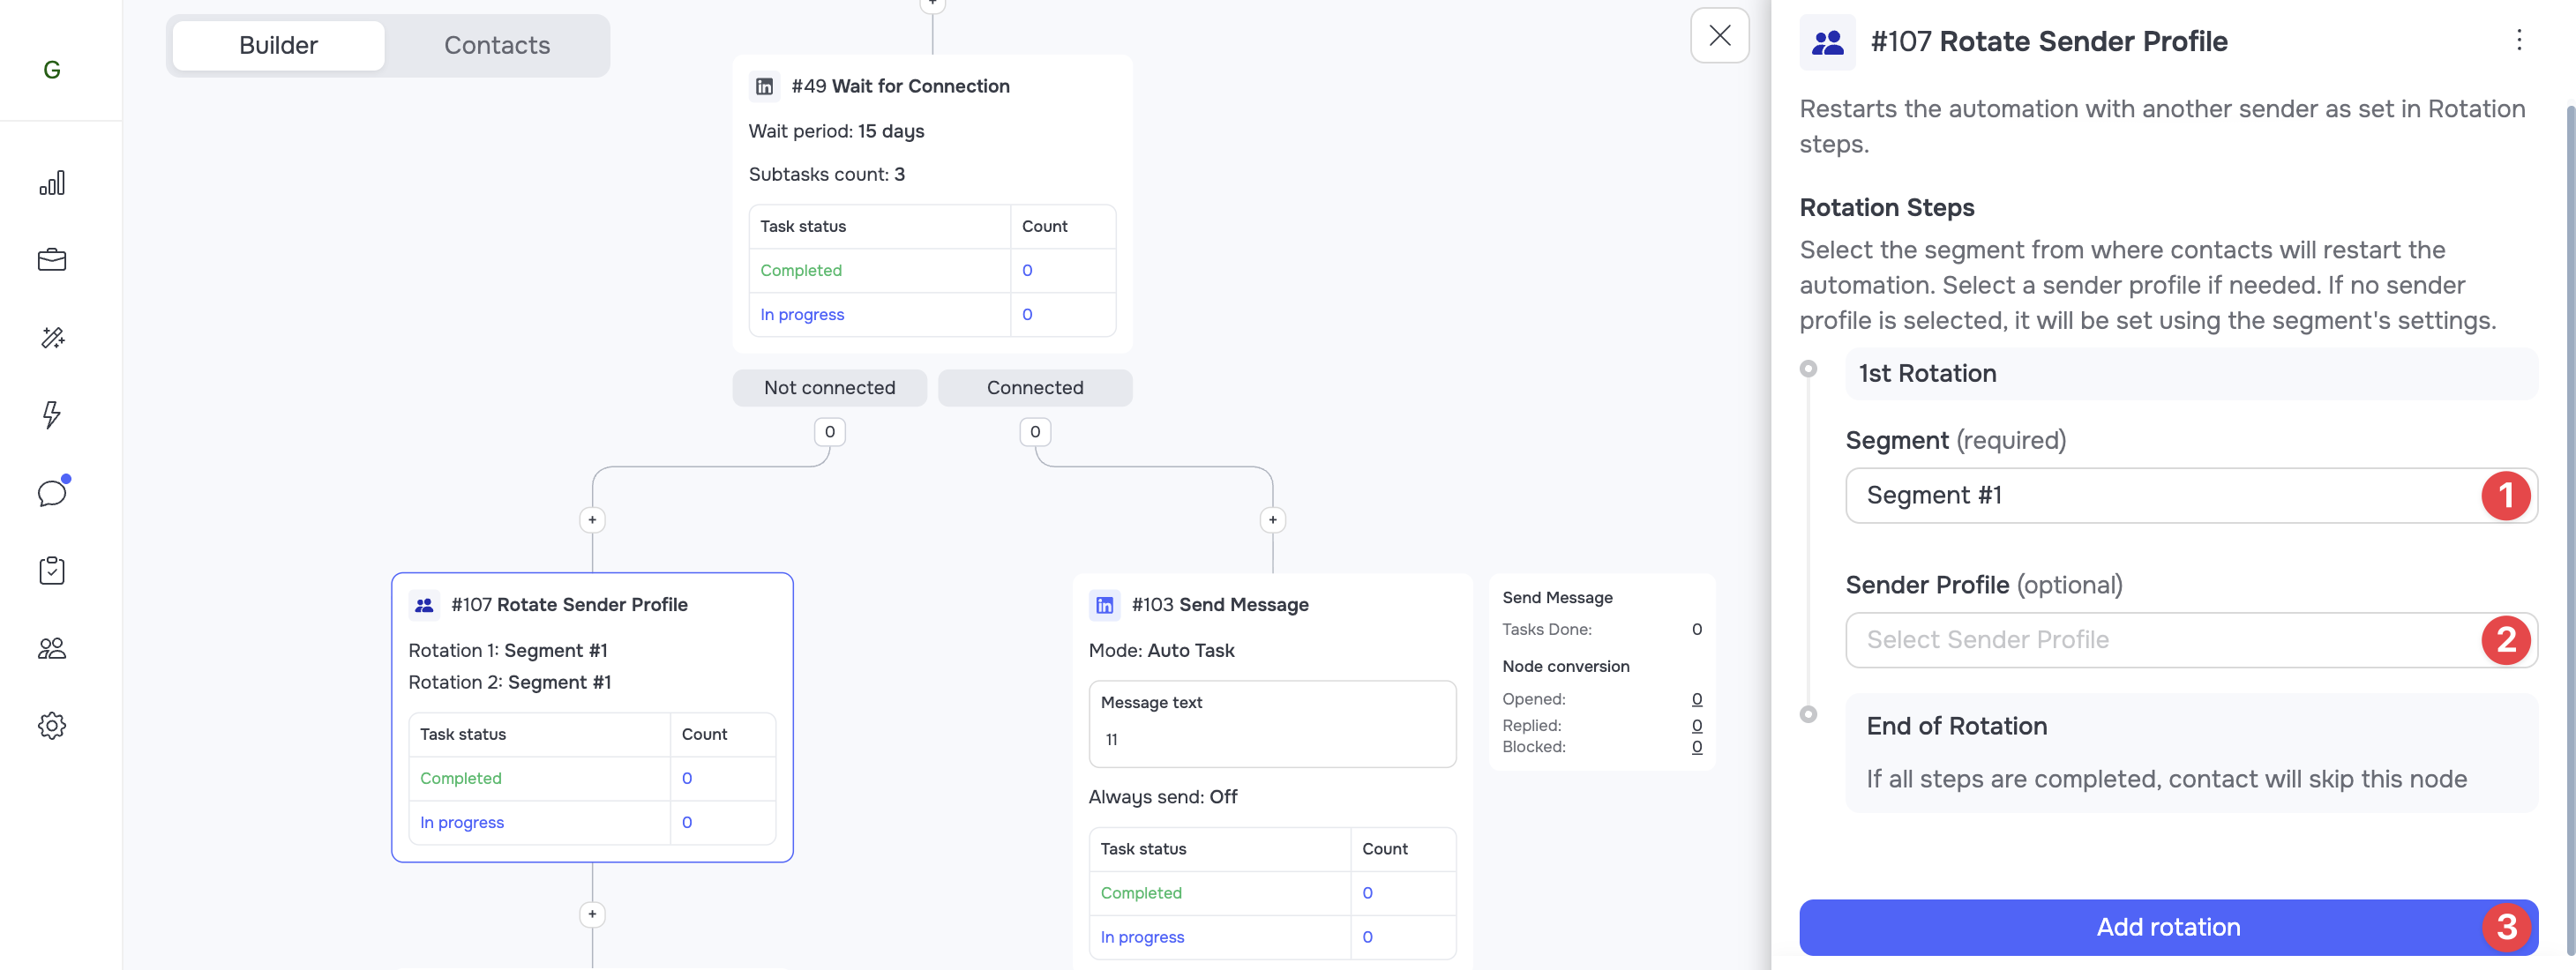
To set up rotation, add the Rotate Sender Profile node at the required place in your automation and fill in its parameters in the side panel:
-
Segment: Select from the list the segment of the current automation the system should return (restart) the contact to.
-
Sender Profile (Optional): You can force a specific sender profile that the contact will be moved to. You can choose any available profile, even if it is not connected to this automation.
- If you leave the field empty, the system will choose a sender itself among the profiles connected to the segment you selected.
-
Add Rotation: Set the number of rotation loops. For example, if you add 3 rotations, the node will return the contact to the start of the automation with a sender change exactly 3 times.
🟢 Tip: The best practice is to set the number of rotation loops to 1 less than the total number of sender profiles in the automation. Since the first profile is assigned to the contact by default right at the start, all the others will be connected precisely through rotation. This way, all connected senders are guaranteed to try to reach the lead (provided the contact reaches the branch of the scenario where this node is placed).
🟡 Note: If the specified number of rotations exceeds the number of available unique profiles (with the Rotate to a new Sender Profile distribution method set), the contact will get the Failed status at the moment the system runs out of "new" sender profiles to interact with.
How contacts move after rotation
If you continue building an automation branch under the Rotate Sender Profile node (for example, adding a Withdraw Connection Request node), keep an important rule in mind:
-
The contact will move down to the next node under the rotation only after completing all configured rotation loops.
-
This next action (for example, withdrawing the request) will be performed on behalf of the sender profile that was assigned on the last rotation loop.