The API Call feature allows you to seamlessly import/export data about contacts or companies to external resources at any stage of the automation.
Step 1: Configure API Call Accounts
Create your authorization credentials.
-
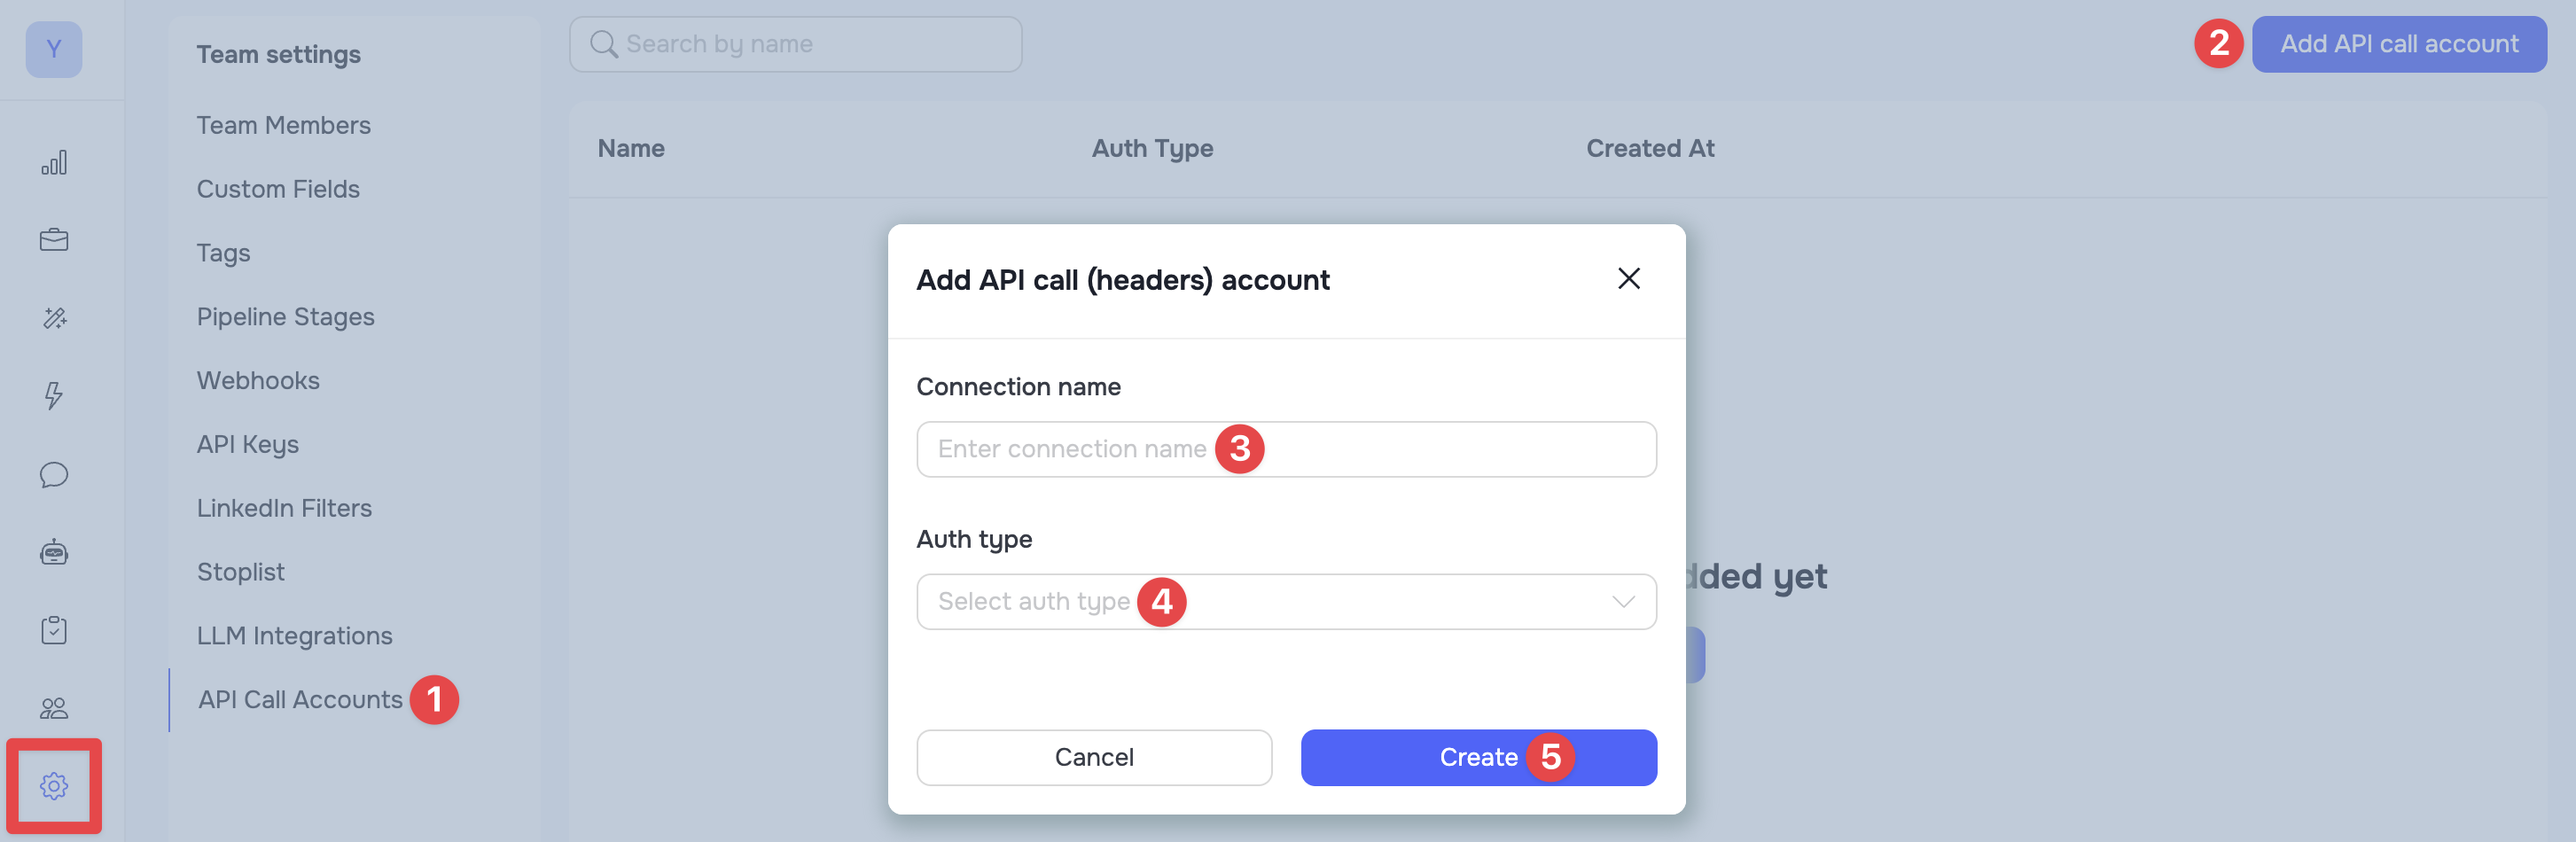
Navigate to API Call Accounts in the settings section (1).
-
Click Add API call account (2).
In the modal window, configure the following:
-
Connection name (3): enter a name for this connection.
-
Auth type (4): choose the method required by your service and enter the required data:
There are 3 Auth types:
| Auth Type | Required Data |
|---|---|
| API Key | Key name, Value, Add to |
| Bearer token | Token |
| Basic auth | Username, Password |
- Click Create (5).
Step 2: Adding the API Call to the Sequence
-
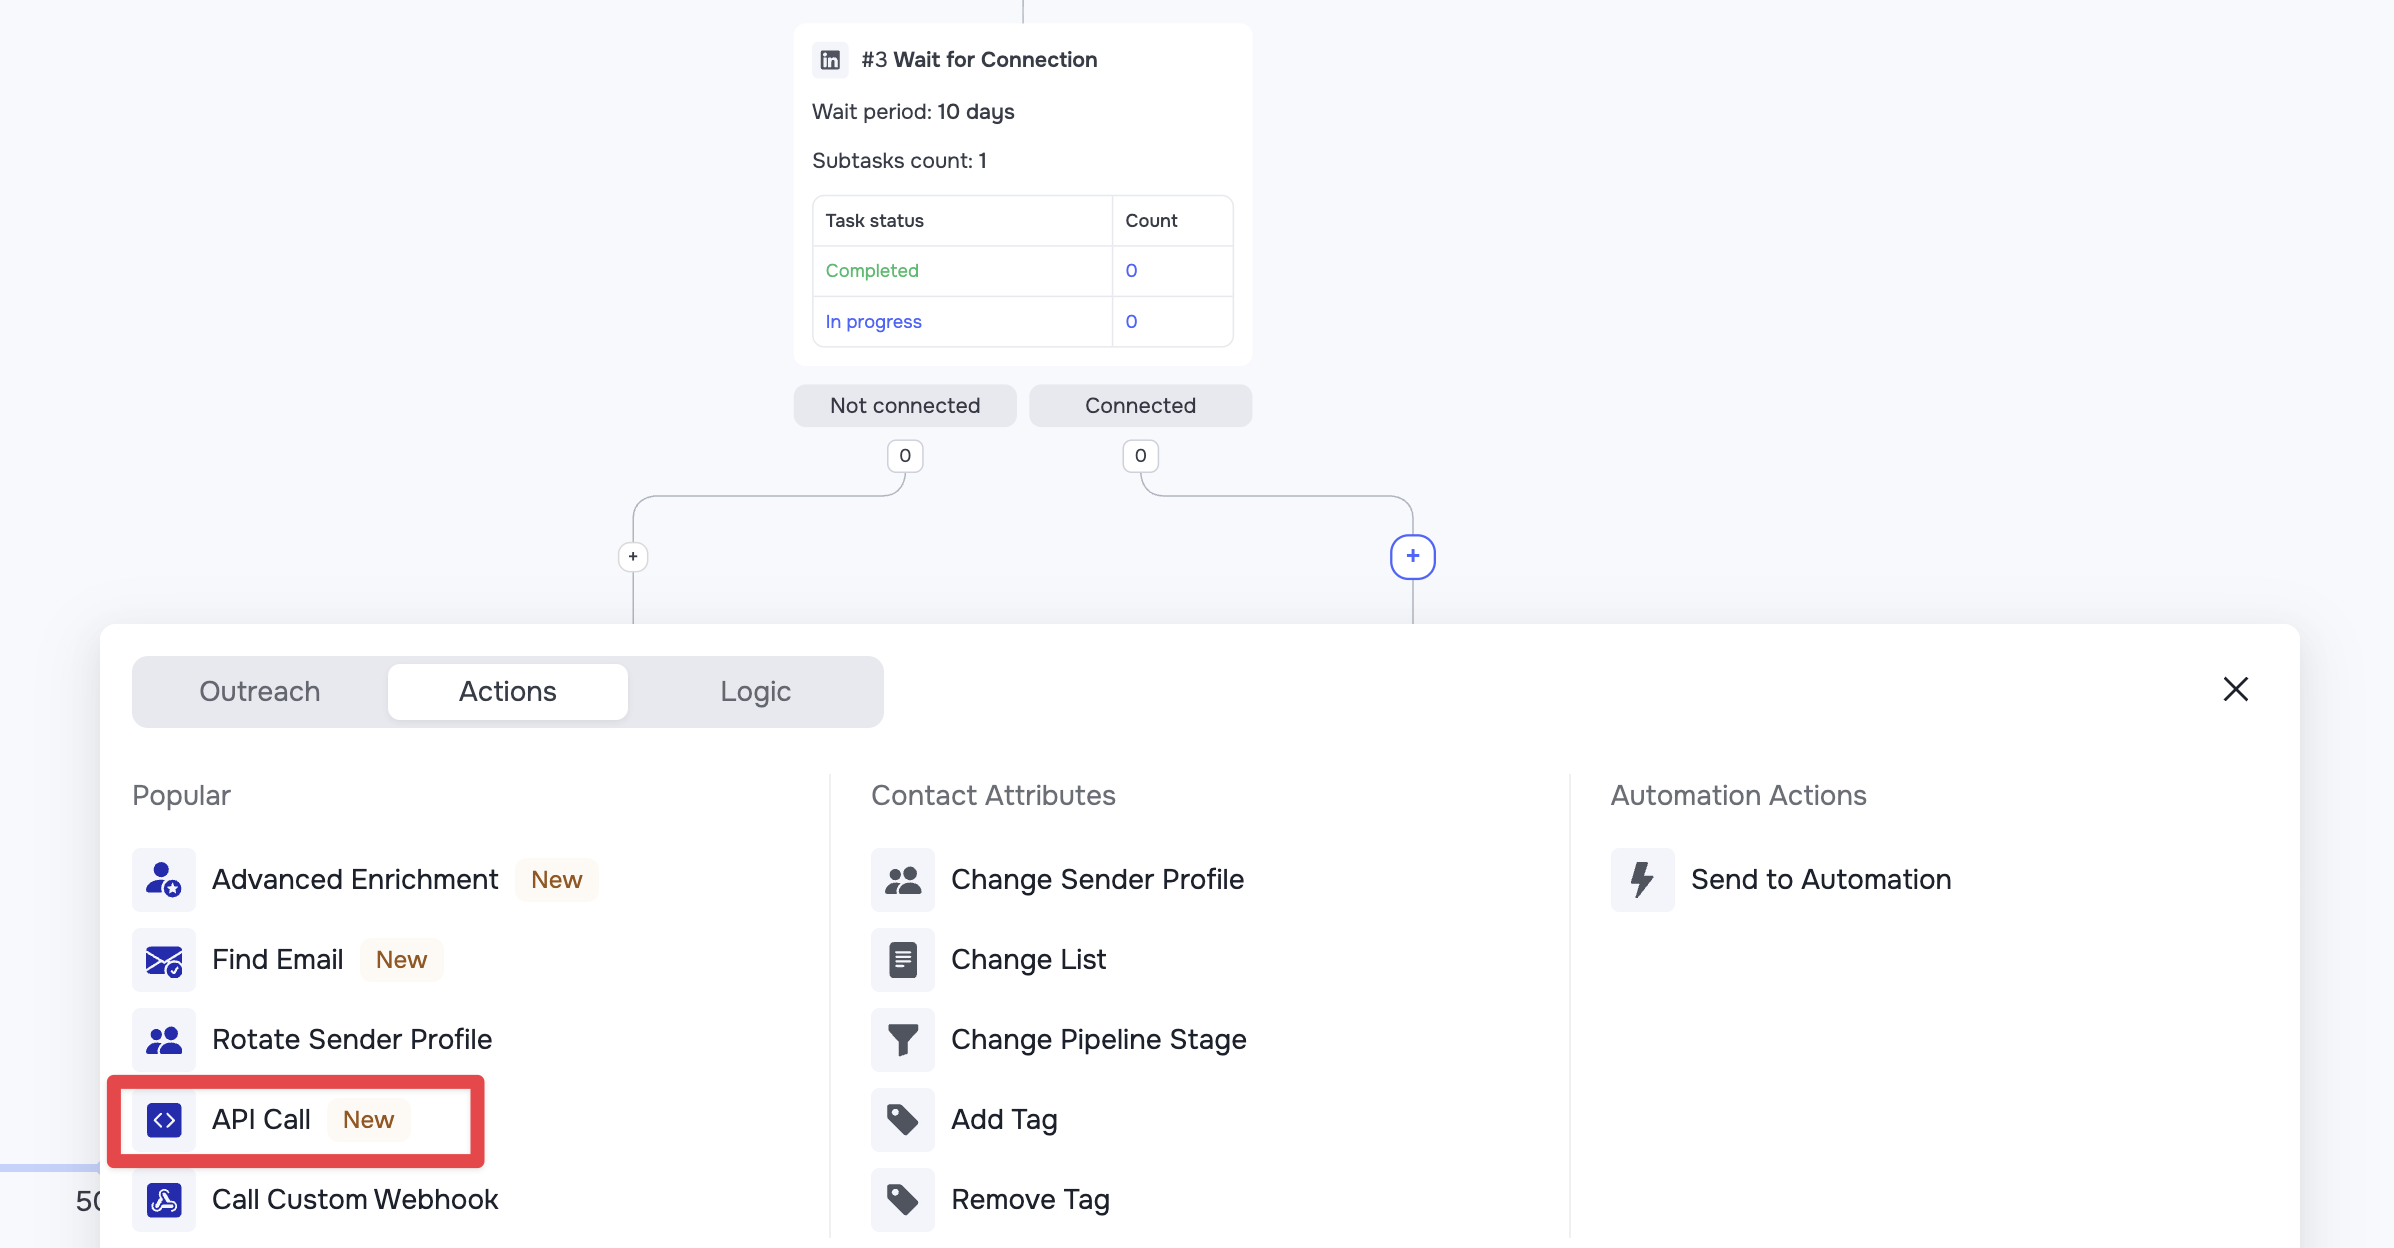
Open the automation builder.
-
Add the API Call node at the desired point in your workflow.
Step 3: API Call Settings
1. Basic Configuration
-
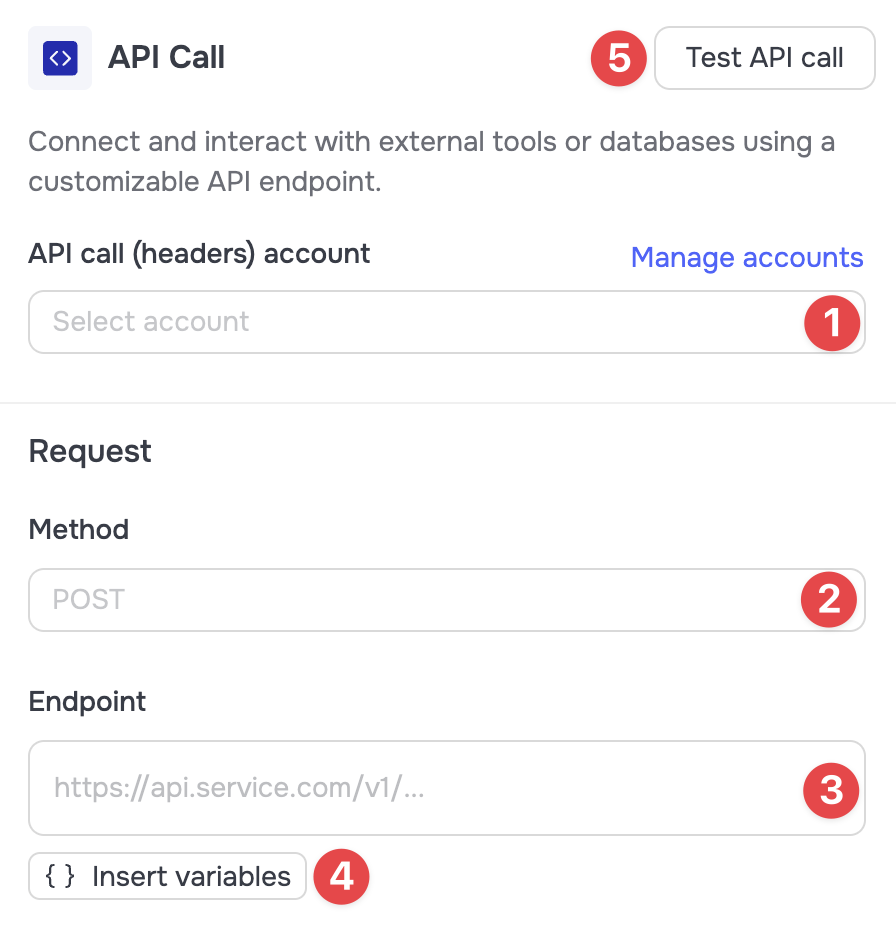
API call (headers) account (1): Select your saved authorization profile.
-
Method (2): Choose the HTTP method.
-
Endpoint (3): Enter the external API URL. Use the { } Insert variables (4) button to include dynamic data.
-
Test API Call (5): Test the API Call setup.
2. Data Transmission (Optional)
-
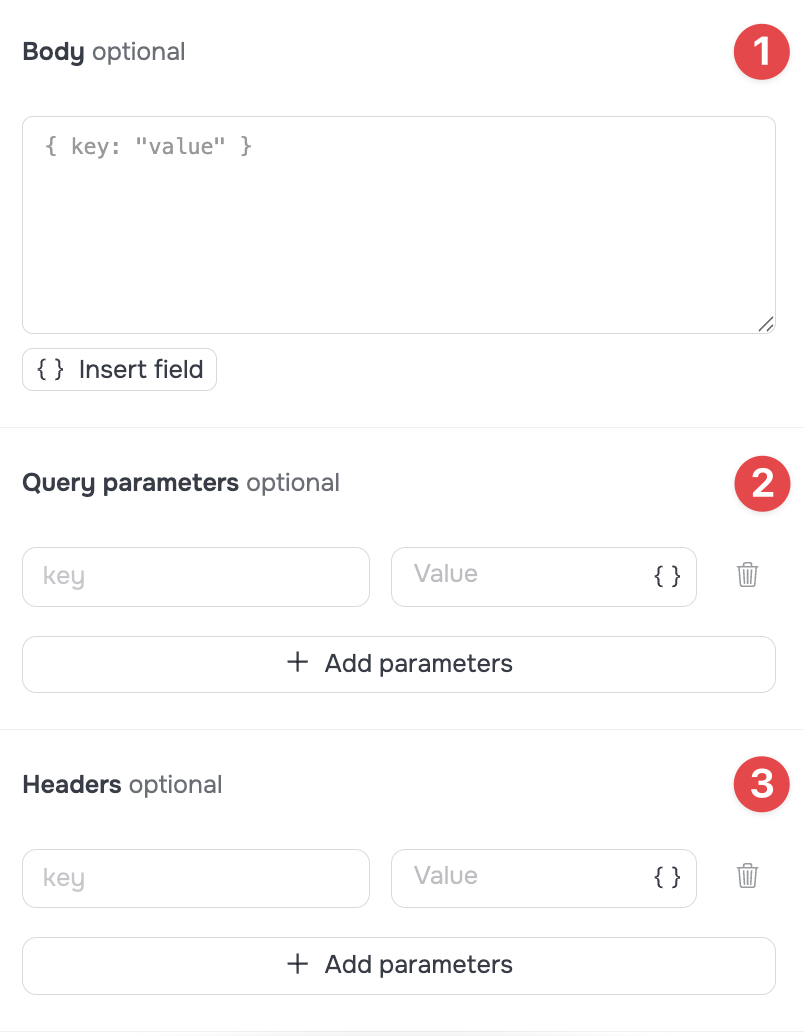
Body (1): If you are using POST, PUT, or PATCH methods, you can define the request body here.
-
Query parameters (2): Query string parameters, provided as Key/Value pairs.
-
Headers (3): Add any additional HTTP headers required.
3. Advanced Settings
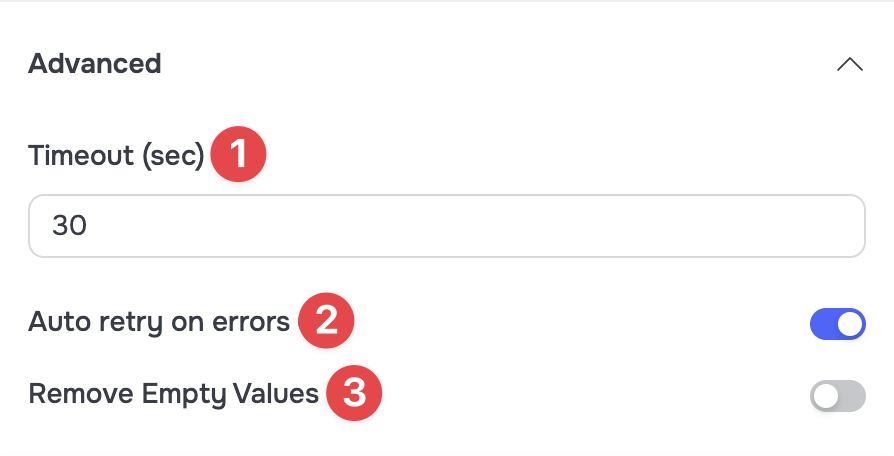
At the bottom of the panel, find important stability settings:
-
Timeout (1): Server response wait time (default is 30s).
-
Auto retry on errors (2): Enable this toggle to allow the system to automatically retry the request in case of temporary failures (network errors, rate limits, or 5xx server errors).
-
Remove Empty Values (3): Enable this toggle to automatically exclude empty, null, or undefined values from the request. This helps protect your data from being accidentally overwritten with empty strings.